👩🍳👩🍳👩🍳👩🍳¡Buenos días a toda mi valiente comunidad! Seguimos creyendo en la plataforma de HIVE y compartiendo artículos de interés, así como nuestras experiencias, creaciones y habilidades en diversos ámbitos. Hoy quiero mostrarles el proceso de elaboración de una deliciosa torta de chocolate sin leche, que preparé para la presentación final de un curso que tomé sobre panadería y repostería. Debo admitir que disfruté muchísimo de todo el proceso; para mí, es un momento en el que florece la creatividad y me relajo. Así que, a todos los apasionados de la repostería, ¡tomen nota de la receta!
👩🍳👩🍳👩🍳👩🍳Good morning to all my brave community! We continue to believe in the HIVE platform and to share articles of interest, as well as our experiences, creations and skills in various fields. Today I want to show you the process of making a delicious dairy-free chocolate cake, which I prepared for the final presentation of a course I took on baking and pastry. I must admit that I really enjoyed the whole process; for me, it is a moment when creativity blossoms and I relax. So, to all pastry enthusiasts, take note of the recipe!
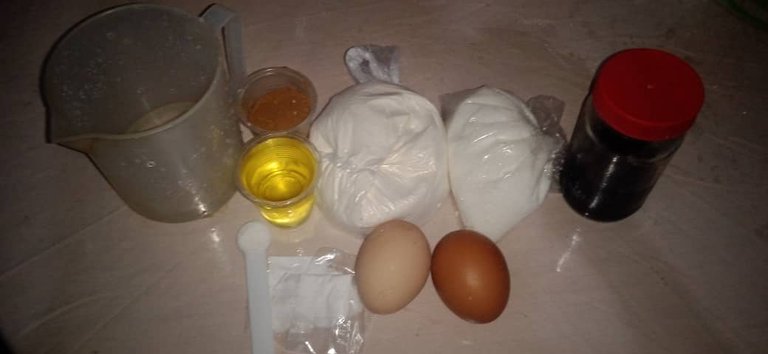
👩🍳👩🍳👩🍳👩🍳Ingredientes necesarios para preparar la mezcla de la torta de chocolate sin leche: 2 huevos, 200 gramos de harina de trigo leudante, 200 gramos de azúcar, 20 gramos de cacao en polvo, 6 gramos de bicarbonato de sodio, 4 gramos de sal, 5 mililitros de extracto de vainilla, 60 mililitros de aceite vegetal y 160 mililitros de agua caliente.
👩🍳👩🍳👩🍳👩🍳 Ingredients needed to prepare the dairy-free chocolate cake mix: 2 eggs, 200 grams of leavening wheat flour, 200 grams of sugar, 20 grams of cocoa powder, 6 grams of baking soda, 4 grams of salt, 5 milliliters of vanilla extract, 60 milliliters of vegetable oil and 160 milliliters of hot water.
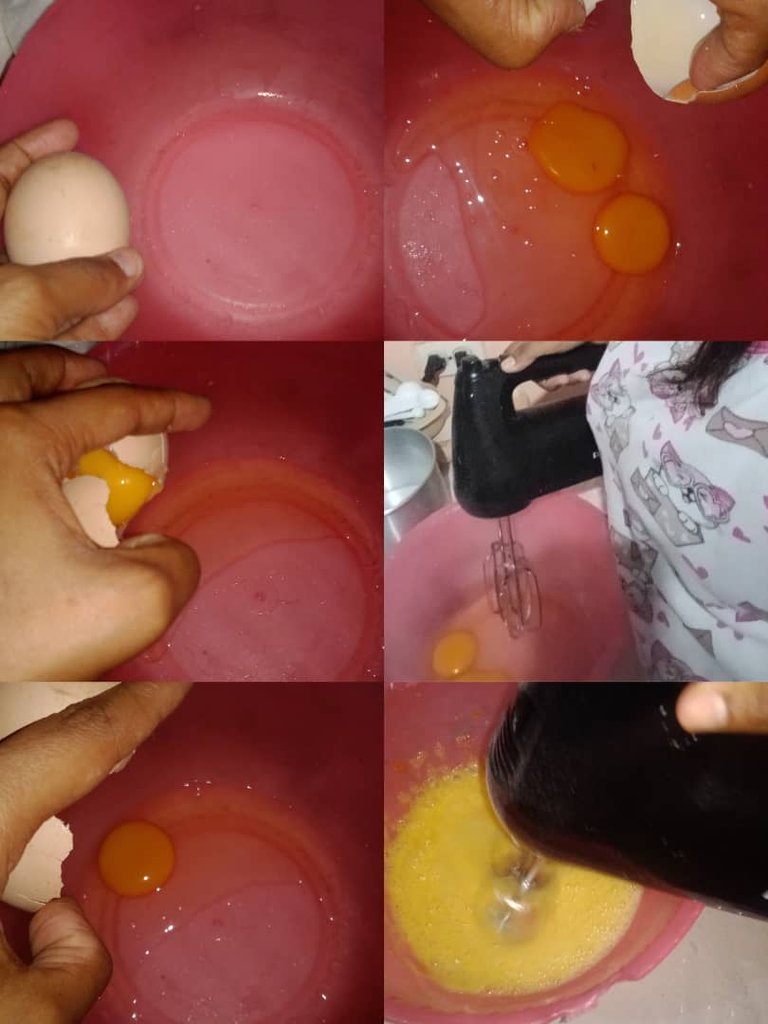
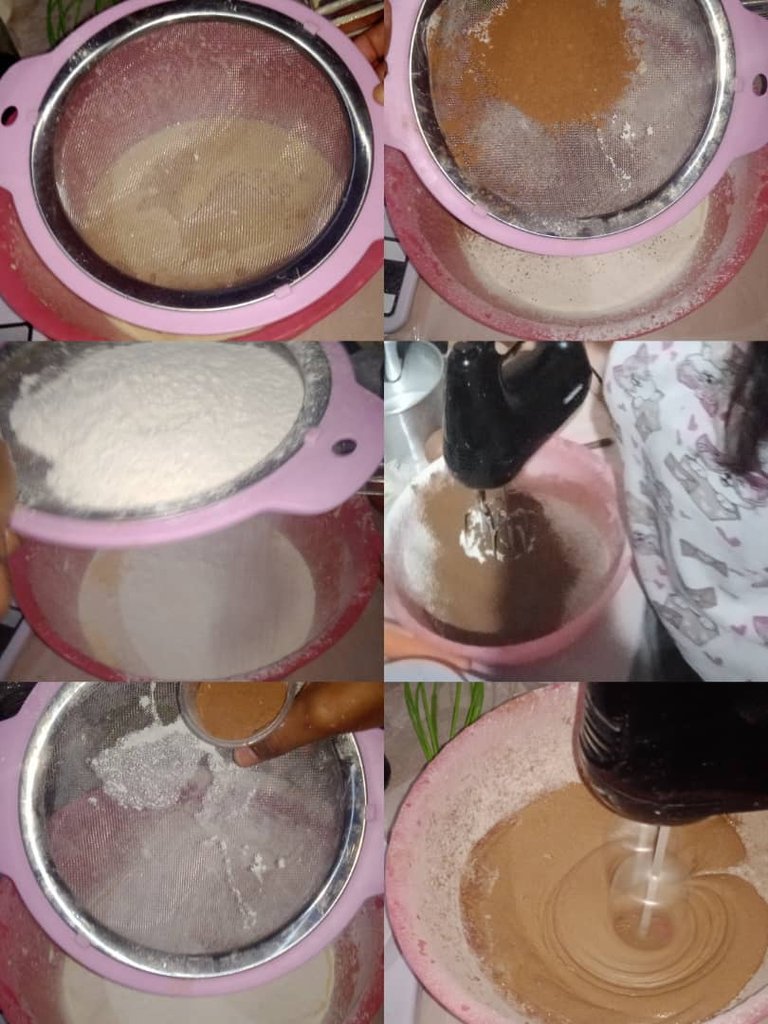
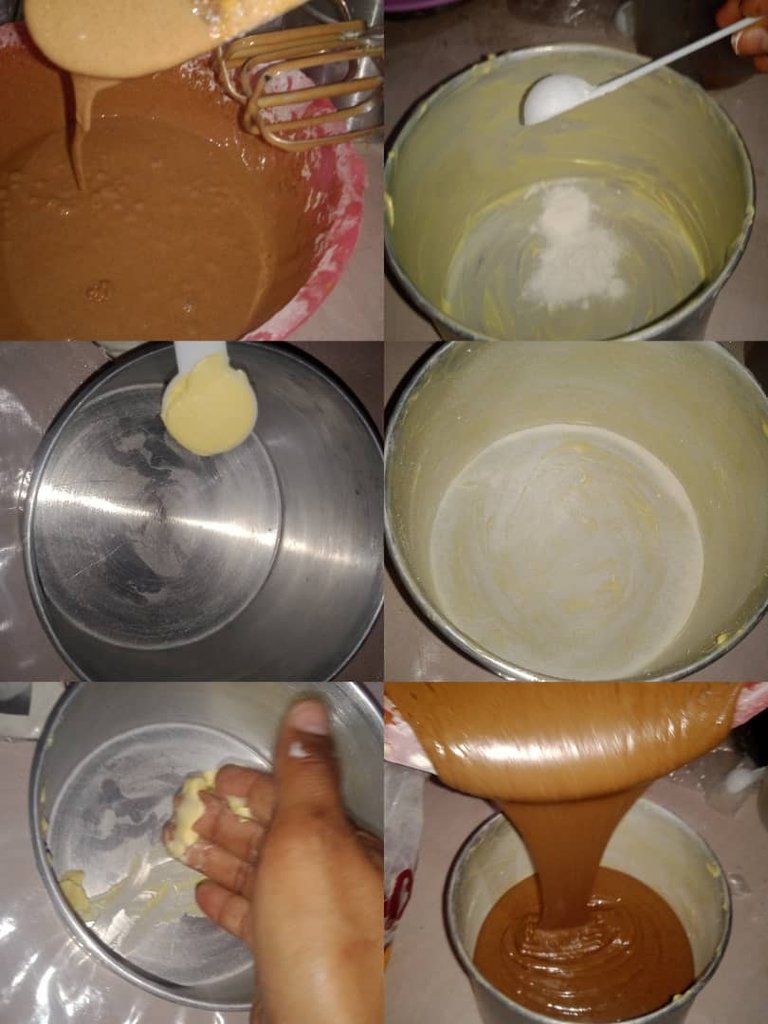
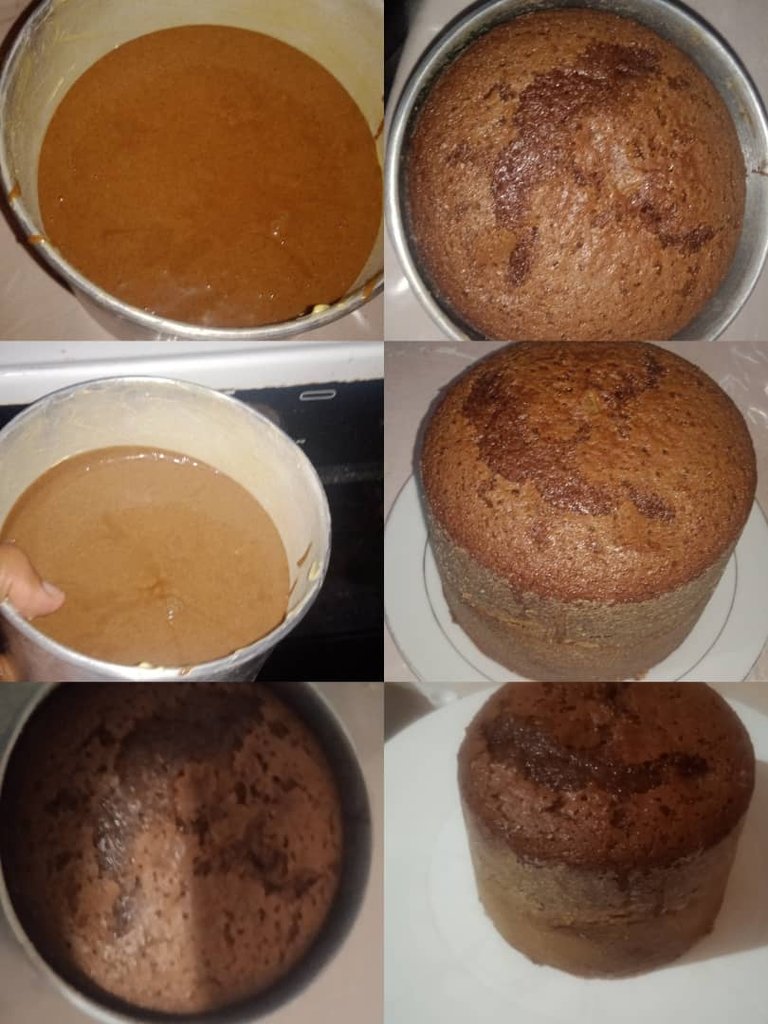
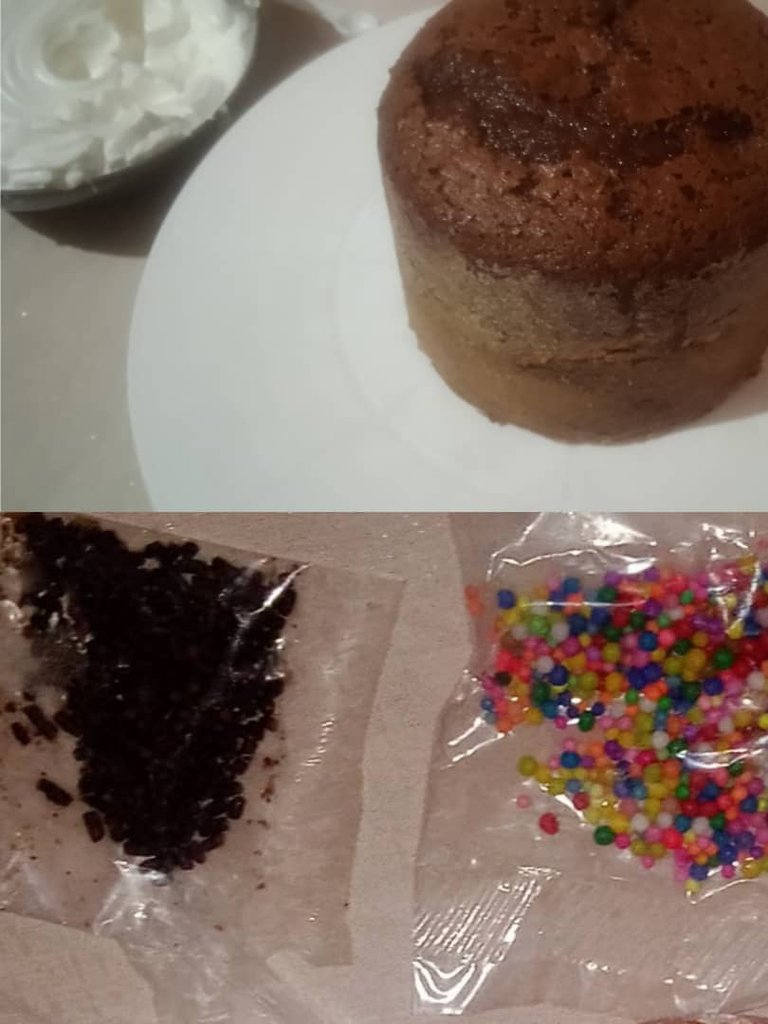
👩🍳👩🍳👩🍳👩🍳 Preparación de la torta de chocolate sin leche: para comenzar, en un bol grande de plástico, rompe los dos huevos enteros y bátelos con una batidora eléctrica durante aproximadamente 5 minutos, hasta que estén completamente diluidos y la mezcla obtenga una consistencia ligeramente espesa. En ese momento, añade los 200 gramos de azúcar blanca y continúa batiendo durante otros 5 minutos, hasta que el azúcar se disuelva por completo. A continuación, incorpora los 60 mililitros de aceite vegetal y los 10 mililitros de extracto de vainilla, mezclando bien todos los ingredientes por 5 minutos más. Luego, añade los 200 gramos de harina de trigo leudante y los 20 gramos de cacao en polvo, y bate nuevamente durante 5 minutos para asegurar que todo esté bien combinado. Una vez que la mezcla esté homogénea, agrega los 160 mililitros de agua caliente y sigue batiendo por otros 5 minutos más. Para finalizar la preparación, incorpora los 6 gramos de bicarbonato de sodio y los 4 gramos de sal, y bate durante 5 minutos, hasta conseguir una mezcla semi espesa. Luego, engrasa un molde con margarina y harina de trigo, y vierte la mezcla en él. Lleva al horno a fuego alto durante 30 minutos, aunque el tiempo puede variar dependiendo de tu horno; en mi caso, tomé alrededor de 1 hora. Una vez que la torta esté horneada, desmóldala con cuidado y colócala en un plato, lista para adornar.
👩🍳👩🍳👩🍳👩🍳 Preparation of the dairy-free chocolate cake: to begin, in a large plastic bowl, break the two whole eggs and beat them with an electric mixer for about 5 minutes, until they are completely diluted and the mixture has a slightly thick consistency. At this point, add the 200 grams of white sugar and continue beating for another 5 minutes, until the sugar is completely dissolved. Next, add the 60 milliliters of vegetable oil and the 10 milliliters of vanilla extract, mixing well all the ingredients for 5 more minutes. Then add the 200 grams of leavened wheat flour and 20 grams of cocoa powder, and beat again for 5 minutes to ensure that everything is well combined. Once the mixture is homogeneous, add the 160 milliliters of hot water and continue beating for another 5 minutes. To finish the preparation, add the 6 grams of baking soda and the 4 grams of salt, and beat for 5 minutes, until a semi-thick mixture is obtained. Then, grease a mold with margarine and wheat flour, and pour the mixture into it. Bake in the oven at high heat for 30 minutes, although the time may vary depending on your oven; in my case, it took about 1 hour. Once the cake is baked, carefully unmold it and place it on a plate, ready to garnish.


👩🍳👩🍳👩🍳👩🍳 Aquí tienes los ingredientes para preparar un merengue fácil y rápido, se llama el merengue francés, ideal para decorar tu torta de chocolate sin leche. Necesitarás dos huevos, 100 gramos de azúcar, 5 mililitros de esencia de mantecado y 5 gramos de canela en polvo. ¡Manos a la obra!
👩🍳👩🍳👩🍳👩🍳 Here are the ingredients to prepare a quick and easy meringue, called French meringue, ideal for decorating your dairy-free chocolate cake. You will need two eggs, 100 grams of sugar, 5 milliliters of butter essence and 5 grams of cinnamon powder. Let's get to work!

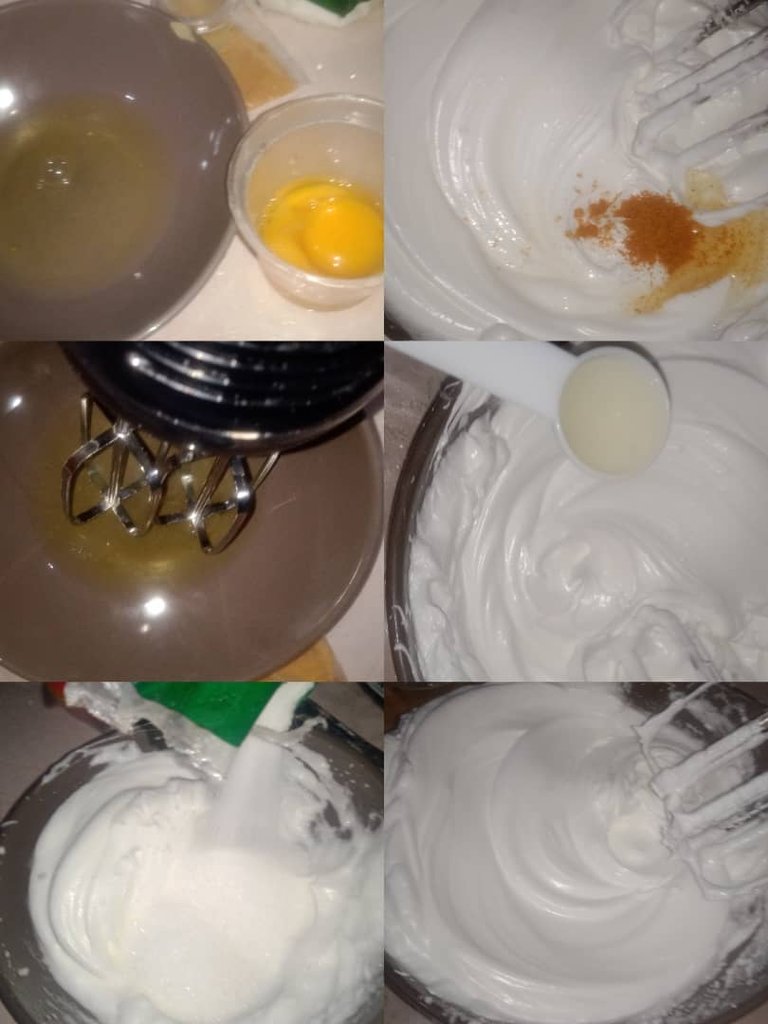
👩🍳👩🍳👩🍳👩🍳 Preparación para hacer el merengue francés: primero, necesitaremos dos recipientes, uno de cerámica y otro de plástico. Utilizaremos el de cerámica para preparar el merengue. En este recipiente, introduciremos las dos claras de huevo y, con la ayuda de una batidora, batiremos bien durante aproximadamente 5 minutos, hasta que la mezcla esté espumosa, blanca y un poco espesa. En ese momento, añadiremos los 100 gramos de azúcar refinada y continuaremos batiendo durante 5 minutos más. Luego, incorporaremos los 5 mililitros de esencia de mantecado y los 5 gramos de canela, batiendo otros cinco minutos hasta que logremos un merengue firme, cremoso y consistente. Finalmente, lo reservaremos para decorar.
👩🍳👩🍳👩🍳👩🍳 Preparation for making the French meringue: first, we will need two containers, one ceramic and one plastic. We will use the ceramic one to prepare the meringue. In this container, we will introduce the two egg whites and, with the help of a mixer, we will beat well for approximately 5 minutes, until the mixture is frothy, white and a little thick. At that moment, add the 100 grams of refined sugar and continue beating for 5 more minutes. Then, add the 5 milliliters of butter essence and the 5 grams of cinnamon, beating for another five minutes until a firm, creamy and consistent meringue is obtained. Finally, set aside to decorate.
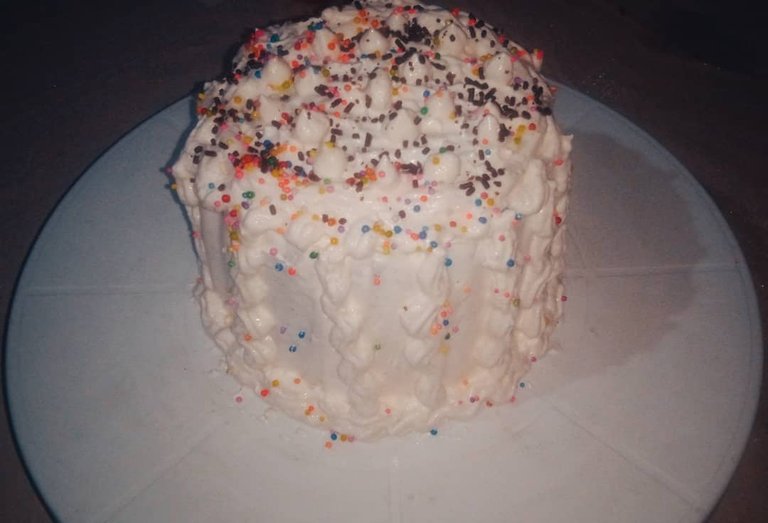
👩🍳👩🍳👩🍳👩🍳 Ha llegado el momento más emocionante y creativo en el arte de la repostería: ¡la decoración de la torta! En esta etapa, utilizaremos el merengue francés que preparamos anteriormente, complementándolo con 2 gramos de lluvia de chocolate y 4 gramos de coloridos confetis. Y, por supuesto, la protagonista de este festín: la torta, que ya ha reposado.
👩🍳👩🍳👩🍳👩🍳The most exciting and creative moment in the art of baking has arrived: decorating the cake! At this stage, we will use the French meringue we prepared earlier, complementing it with 2 grams of chocolate rain and 4 grams of colorful confetti. And, of course, the protagonist of this feast: the cake, which has already set.
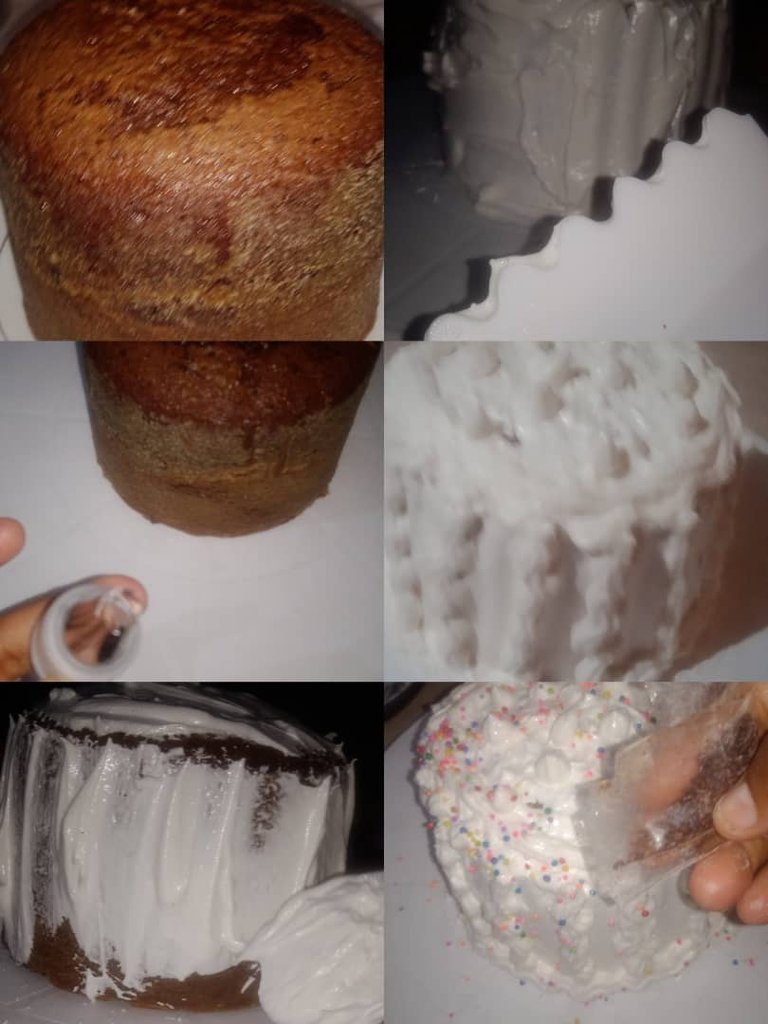
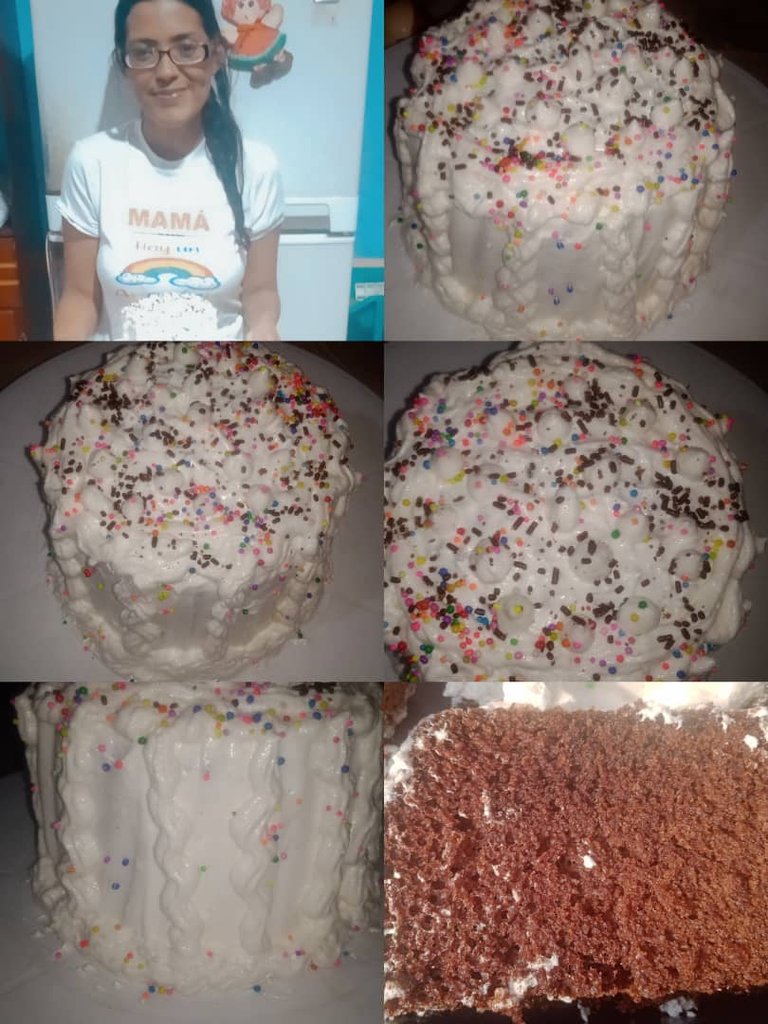
👩🍳👩🍳👩🍳👩🍳 Para aplicar el merengue, primero tomaremos una manga pastelera y le colocaremos la boquilla de nuestra preferencia. Antes de comenzar, usaremos una cuchara para cubrir la torta de manera uniforme y luego utilizaremos una alisadora que se adapte al diseño que hayamos elegido, procurando alisar bien la superficie. En mi caso, decidí utilizar una alisadora con bordes, lo que le aportó un toque especial a la torta. Una vez que la superficie estuvo a mi gusto, comencé a utilizar la manga pastelera para crear algunos diseños. Para finalizar, añadí 2 gramos de lluvia de chocolate y 4 gramos de confeti de colores, decorando la torta a mi estilo.
👩🍳👩🍳👩🍳👩🍳To apply the meringue, first take a piping bag and place the nozzle of your choice. Before starting, we will use a spoon to cover the cake evenly and then we will use a smoothing machine that adapts to the design we have chosen, trying to smooth the surface well. In my case, I decided to use a smoother with edges, which gave a special touch to the cake. Once the surface was to my liking, I started using the piping bag to create some designs. To finish, I added 2 grams of chocolate rain and 4 grams of colored confetti, decorating the cake in my style.
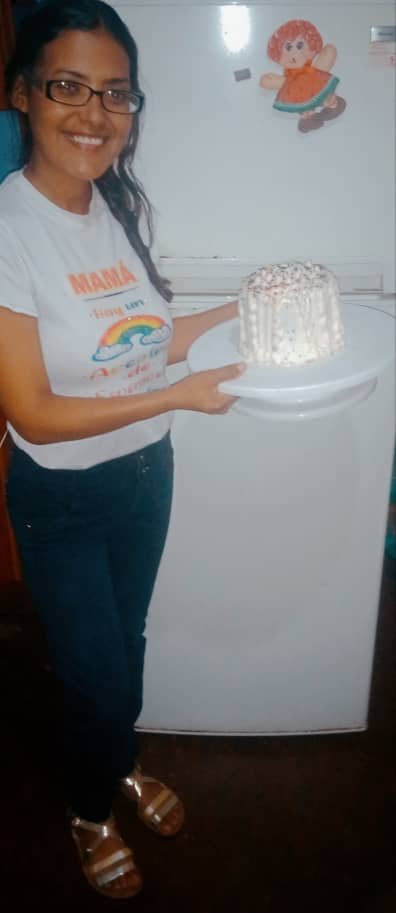
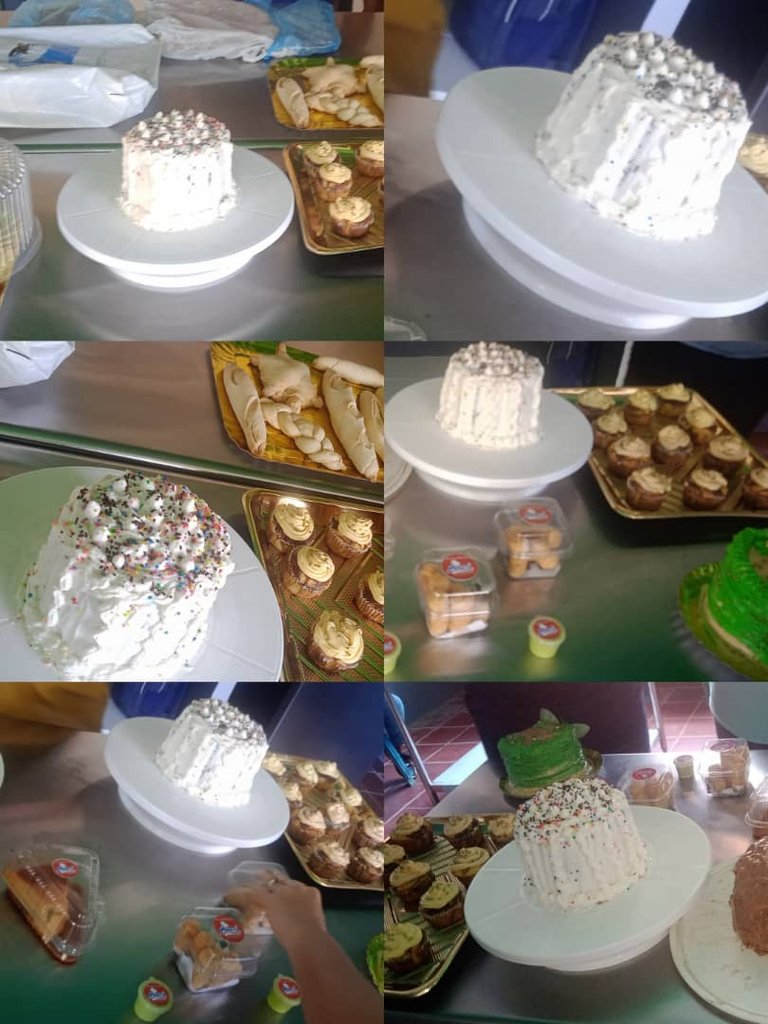
👩🍳👩🍳👩🍳👩🍳 Una vez finalizada la misión de preparar y decorar la torta, me arreglé y, acompañada de mi familia, asistí a la presentación del curso. Allí tuve la oportunidad de exponer el proceso de elaboración de mi creación. Es importante destacar que mi torta se distinguió no solo por su delicioso sabor, sino también por su presentación. Aunque fue sencilla, quedó muy bonita, sobre todo porque aún estoy dando mis primeros pasos en el arte de la decoración. Agradezco de antemano a todos aquellos que voten por mi publicación. Reciban un cordial saludo y mi respeto. ¡Hasta pronto!
👩🍳👩🍳👩🍳👩🍳 Once the mission of preparing and decorating the cake was finished, I got dressed up and, accompanied by my family, I attended the presentation of the course. There I had the opportunity to present the process of elaboration of my creation. It is important to point out that my cake stood out not only for its delicious flavor, but also for its presentation. Although it was simple, it was very beautiful, especially because I am still taking my first steps in the art of decoration. I thank in advance all those who vote for my publication. Best regards and my respect, see you soon!

❤️👨🏫 👩🍳El teléfono Redmi 9A me ayudó a tomar las fotos y hacer los collages.
❤️👨🏫 👩🍳The Redmi 9A phone helped me take the photos and make the collages.
❤️👨🏫 👩🍳Languagetool.org me ayudó a corregir errores gramaticales y ortográficos.
❤️👨🏫 👩🍳Languagetool.org helped me correct grammatical and spelling errors.
❤️👨🏫 👩🍳Editpad.org me ayudó a mejorar la redacción y paráfrasis del texto.
❤️👨🏫 👩🍳Editpad.org helped me to improve the writing and paraphrasing of the text.
❤️👨🏫 👩🍳Deepl.com traductor de español al inglés.
❤️👨🏫 👩🍳Deepl.com Spanish to English translator.