Hola querida comunidad de @foodiesbeehive, saludos a todos los integrantes de este familia a los que les fascina y a la vez disfrutan la elaboración de ricos postres.
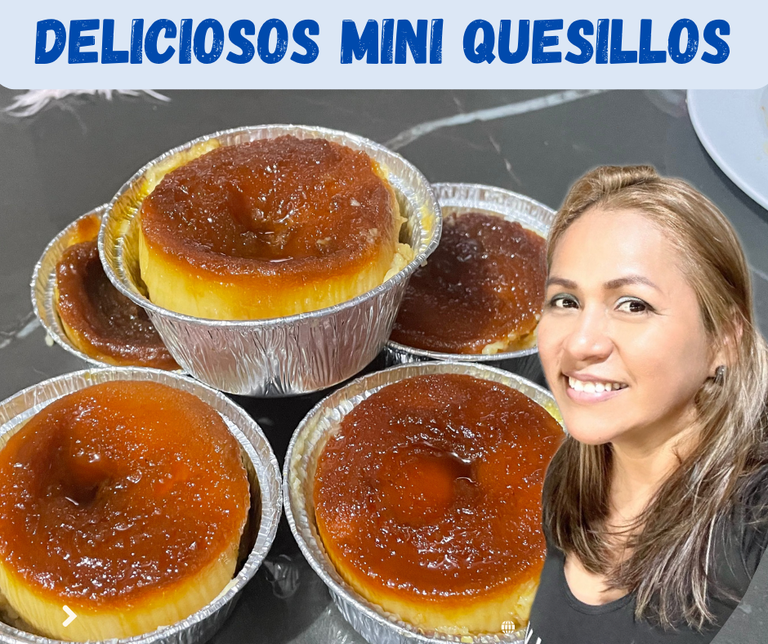
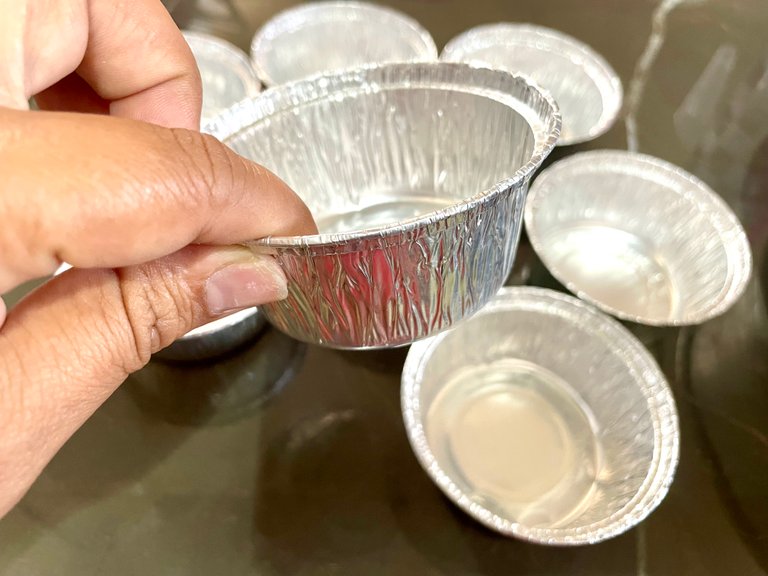
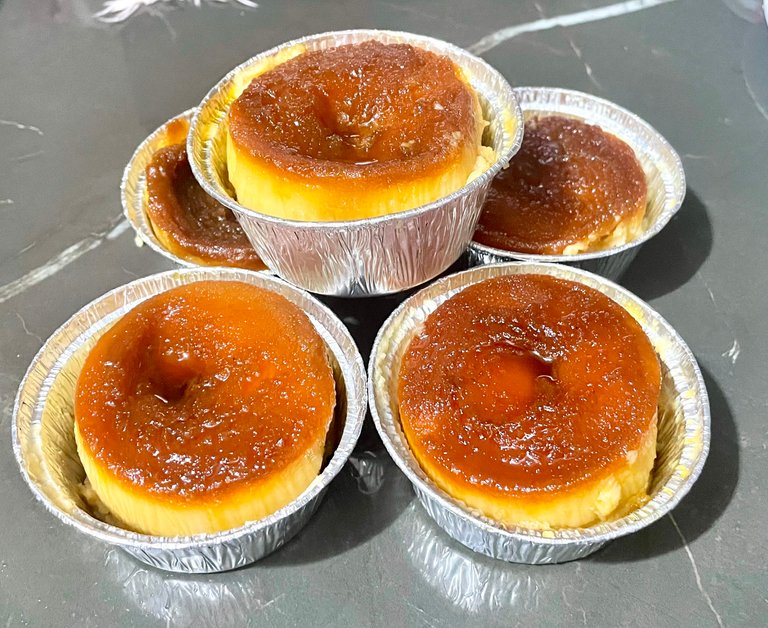
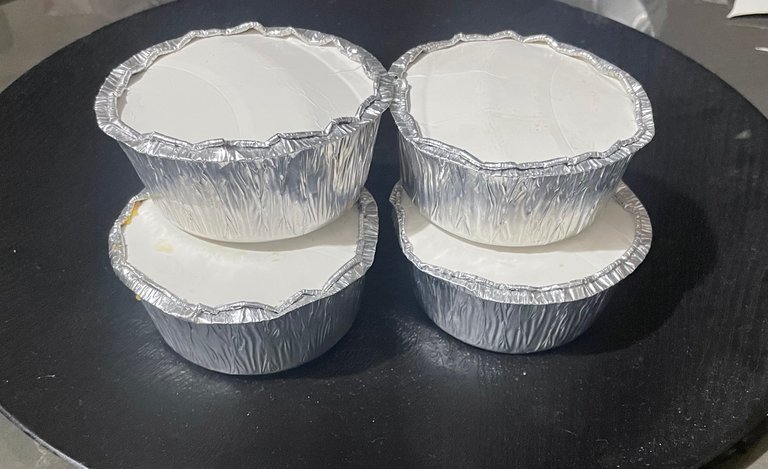
Hoy les quiero compartir una receta deliciosa perfecta para las meriendas, celebraciones o cumpleaños, se trata de uno de los dulces típicos de nuestra tierra el Quesillo. Normalmente se hace en moldes para quesillo, sin embargo en esta ocasión utilicé envases de aluminio individuales para obsequiar, también se pueden comercializar. Esta receta es una maravilla porque además de fácil es económica. Quedan bien ricos . Sé que les va a encantar.
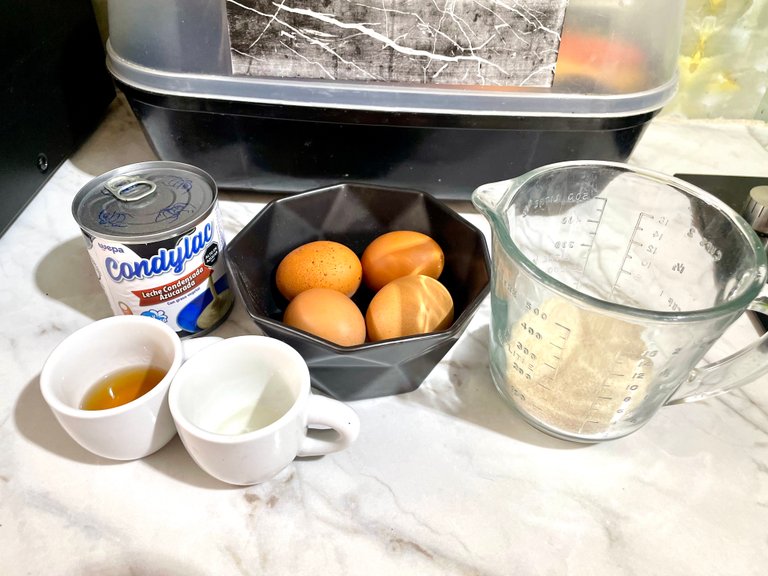
INGREDIENTES: para 7 porciones
- 1 lata (390 gramos) de leche condensada
- 4 huevos a temperatura ambiente
- 300 ml de leche
- 1 cucharadita de vainilla
- 1 cucharada de Ron
Para el Caramelo
- 1/2 taza de azúcar blanca
- 1/4 taza de agua
PREPARACION:
Paso 1:
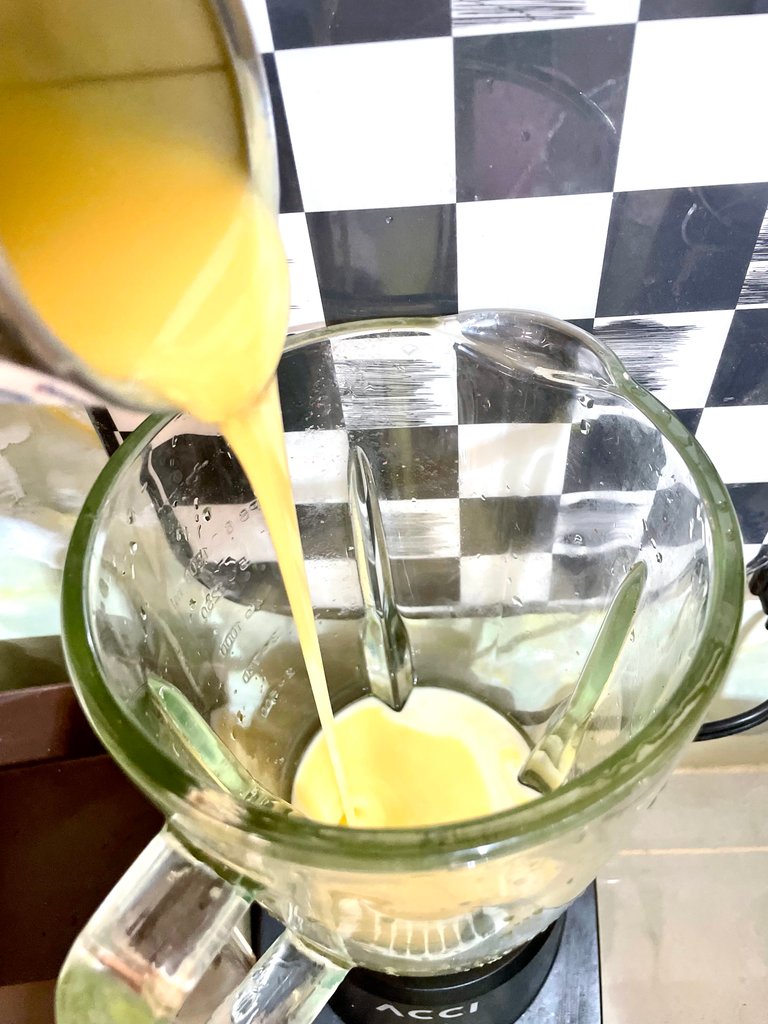
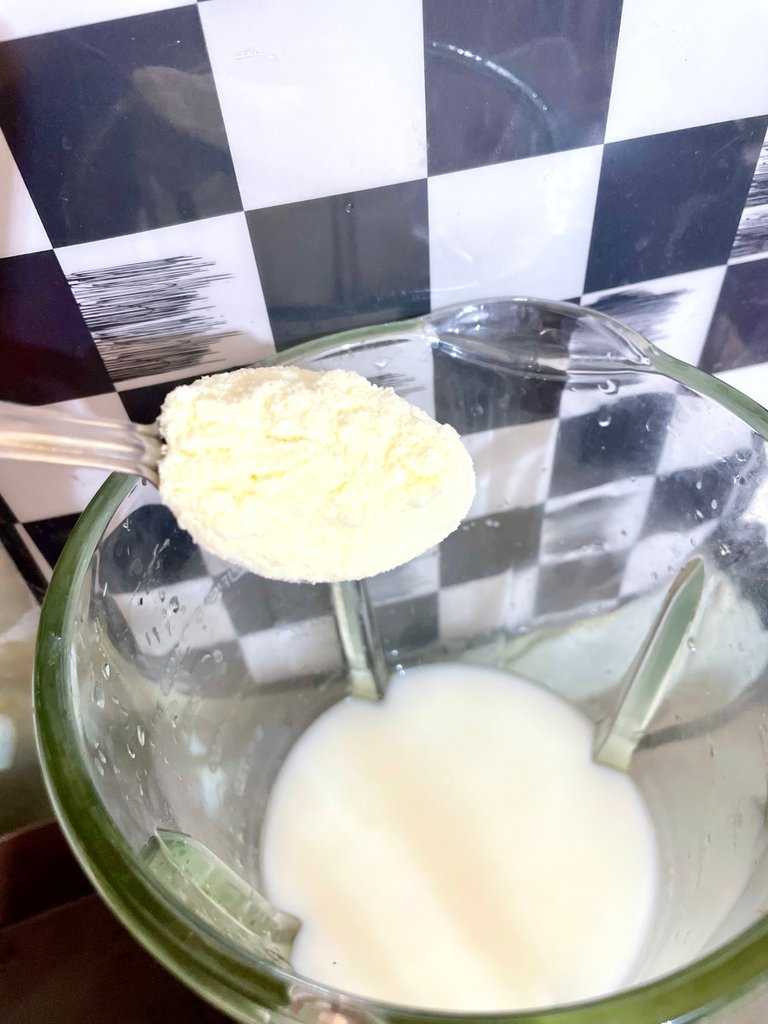
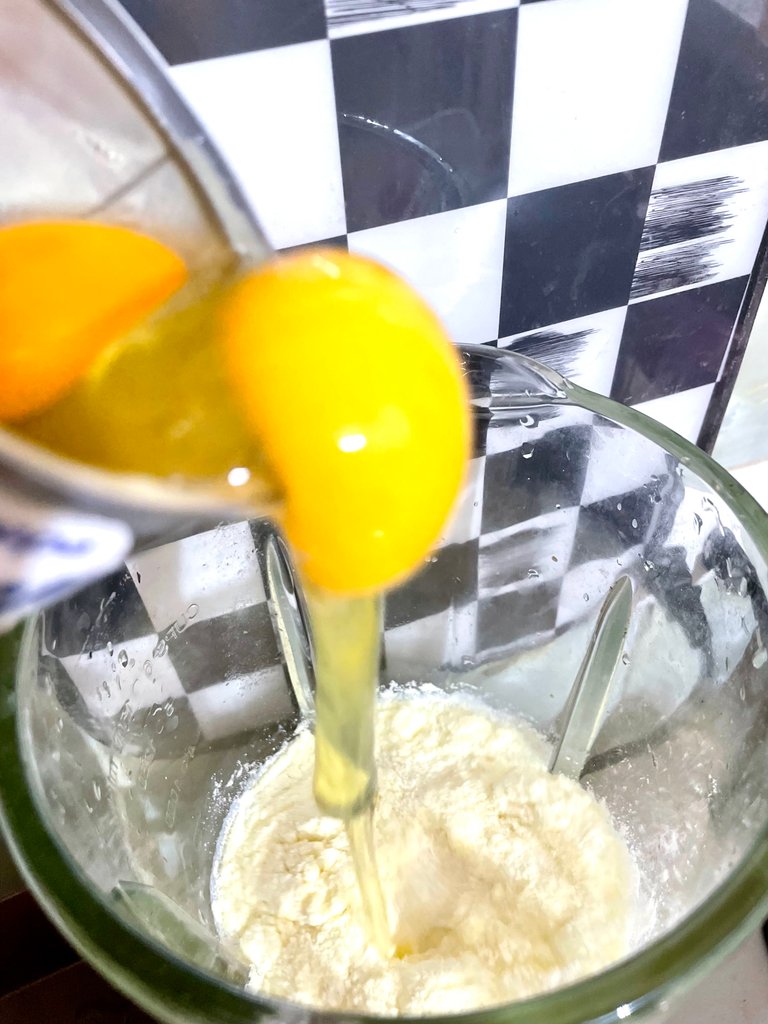
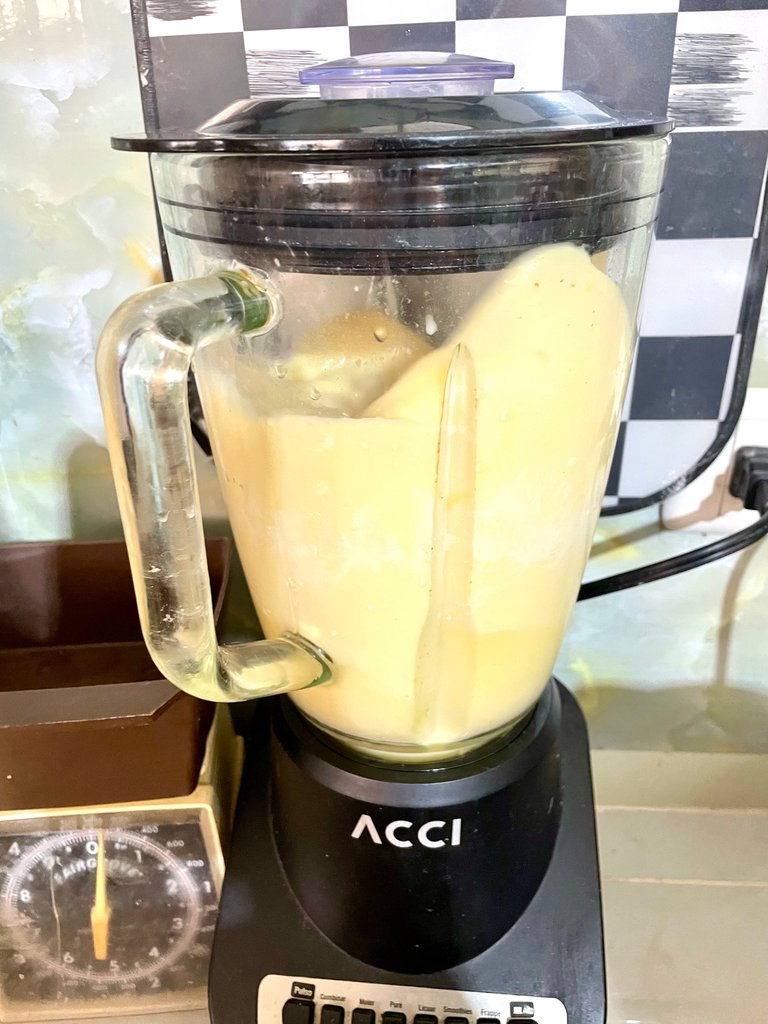
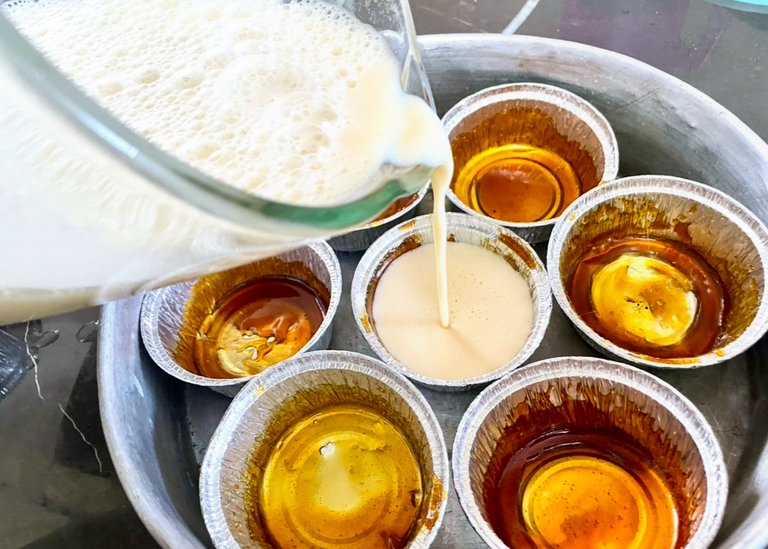
En el vasso de la licuadora colocamos todos los ingredientes los huevos, leche condensada la leche en mi caso puse agua agregué 2 cucharaditas de leche, el ron y la vainilla batimos mezcla aproximadamente 3 minutos.

Paso 2:
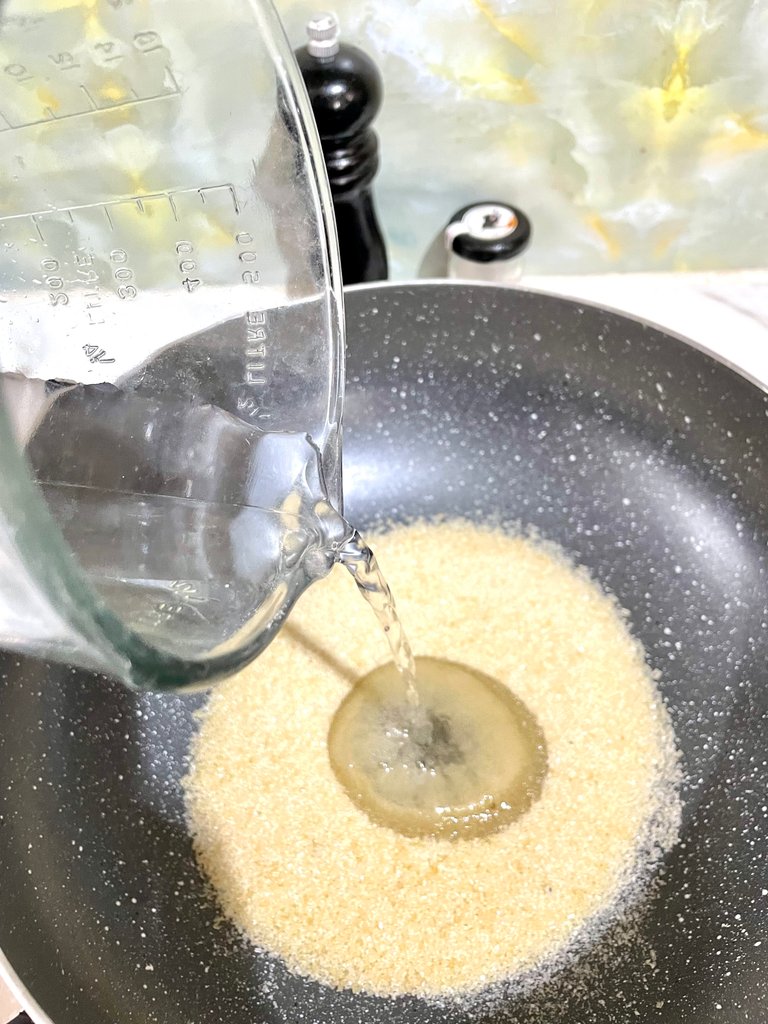
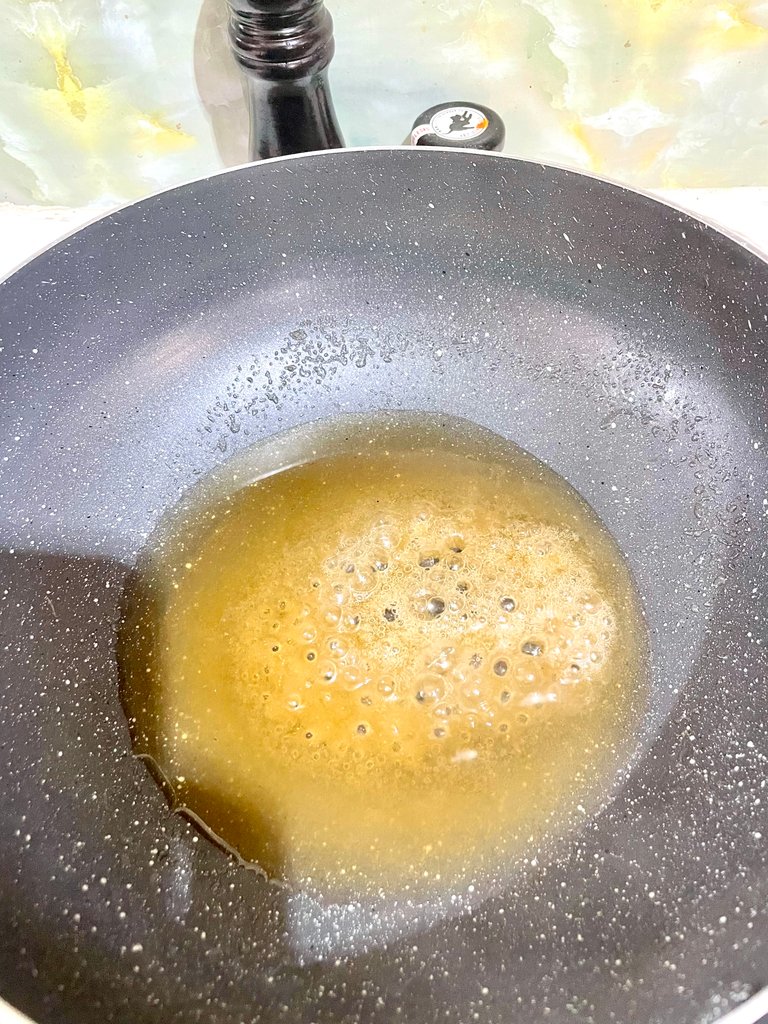
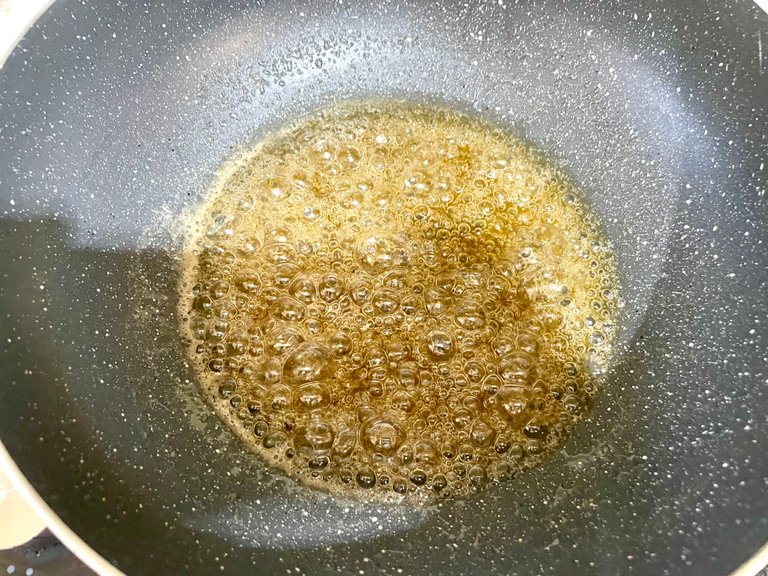
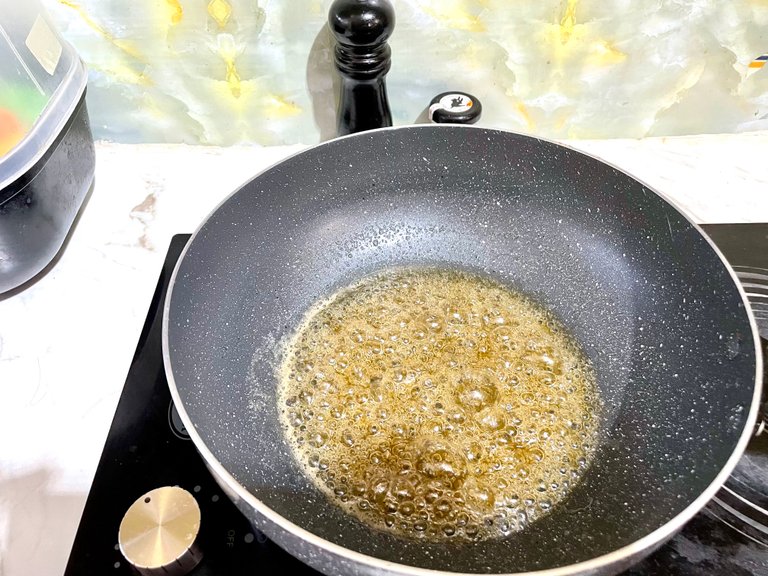
En una olla o sartén a fuego medio colocar el azúcar y agua para hacer un almíbar hasta que comience hacer burbujas y tome un color ámbar claro; una vez que comienza a tomar color es fácil que se queme, así que no lo puedes perder de vista y bajarlo del fuego antes de que se ponga muy oscuro
Paso 3:
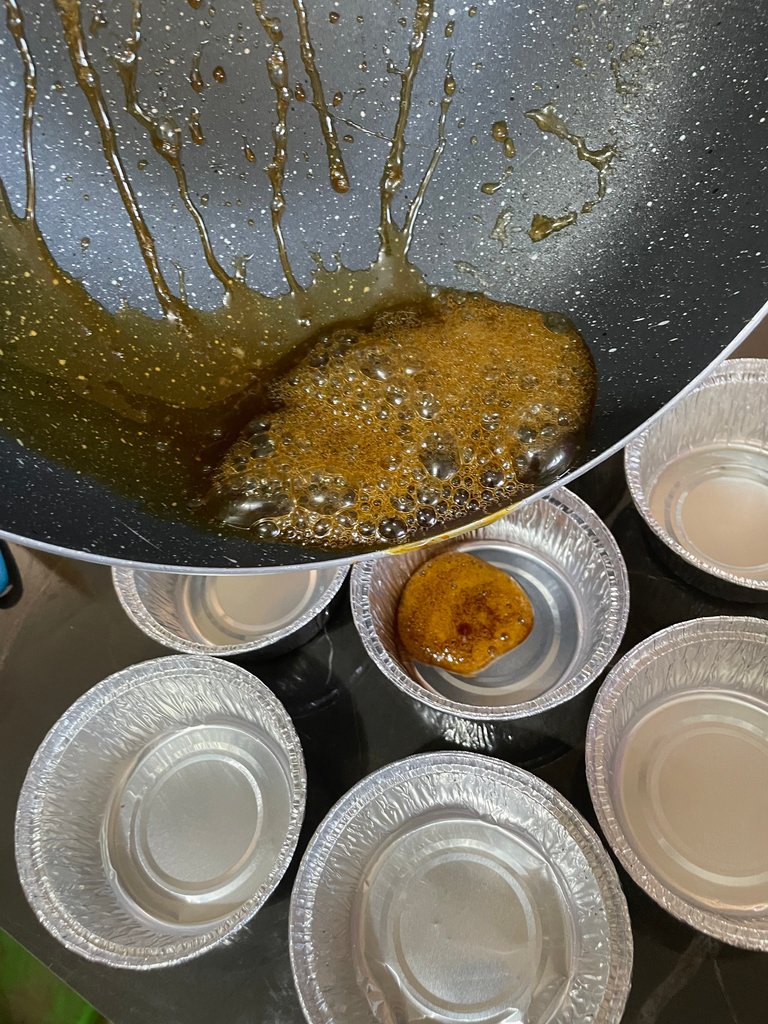
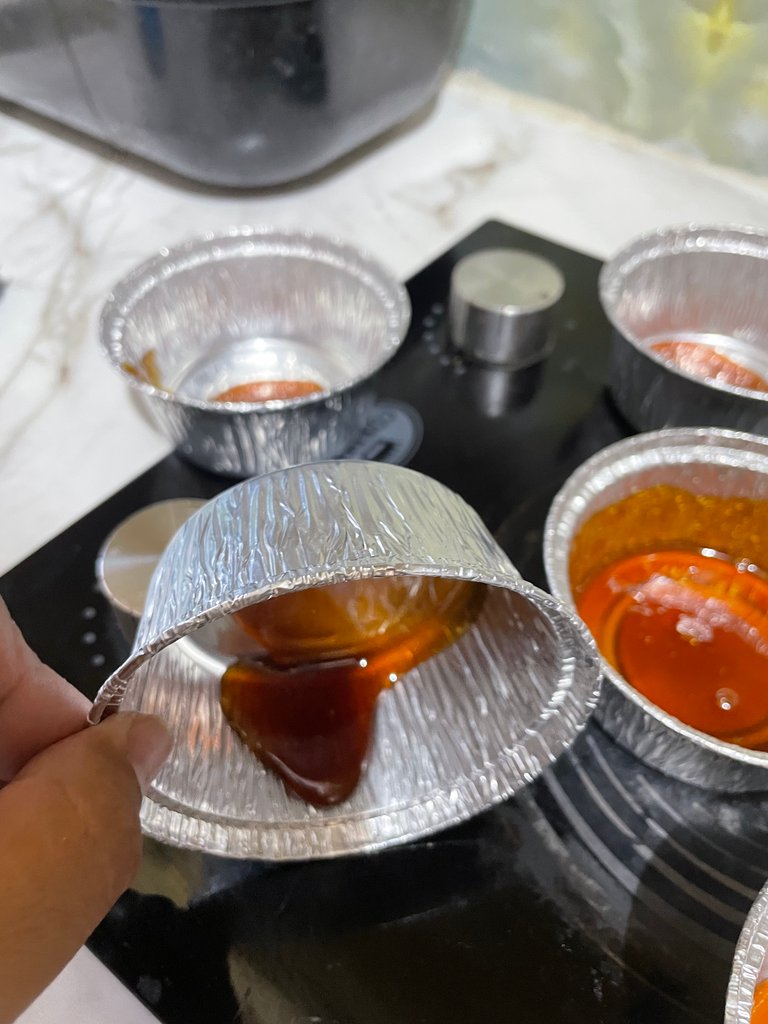
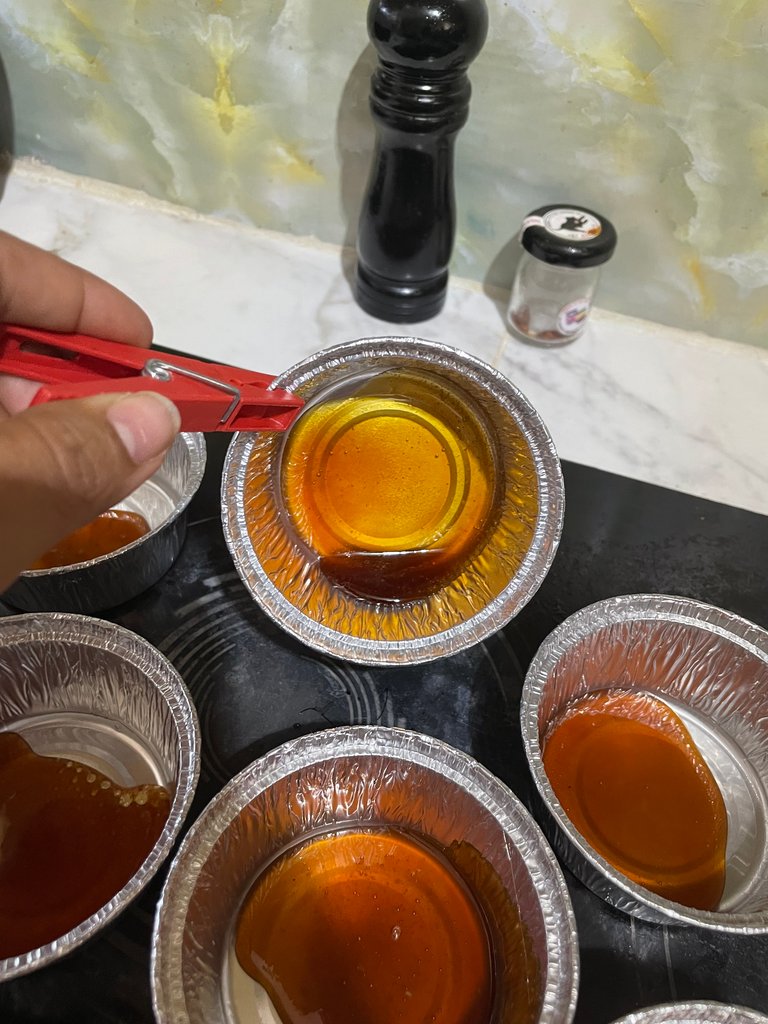
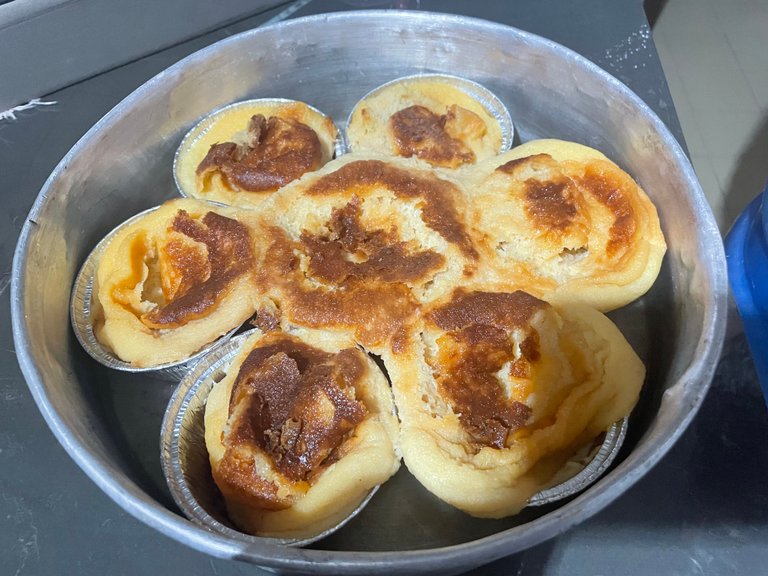
Verter el caramelo sobre la quesillera en esta ocasión utilicé envases de aluminio individuales se enfrió rápido por ser uno por uno y los coloque sobre la hornilla caliente para poder expandirlo en todo el molde luego los dejé enfriar.

Paso 4:
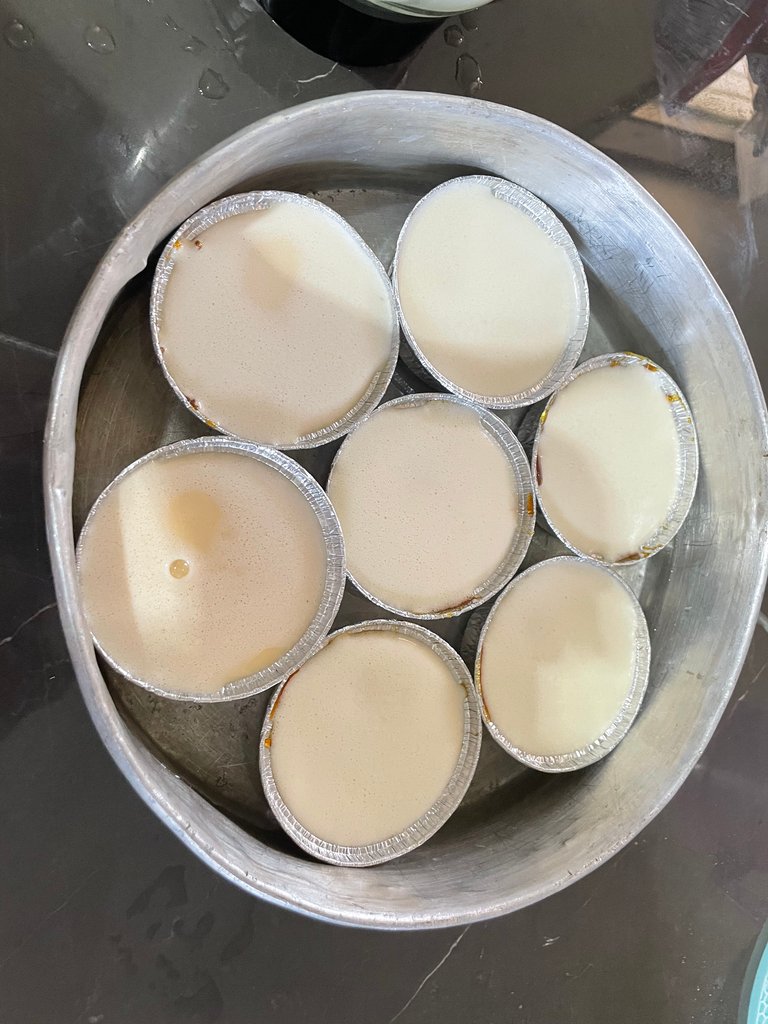
Es momento de hornear , verter la mezcla de la licuadora en los moldes con el caramelo, se coloca una tapa de aluminio en cada molde después Colocar los envases de aluminio o los que utilizan quesillera en un recipiente más amplio, en mi caso utilice otro molde para tortas tapándolo a baño María en el horno y hornear por 40 minutos a 1 hora.
Paso 5:
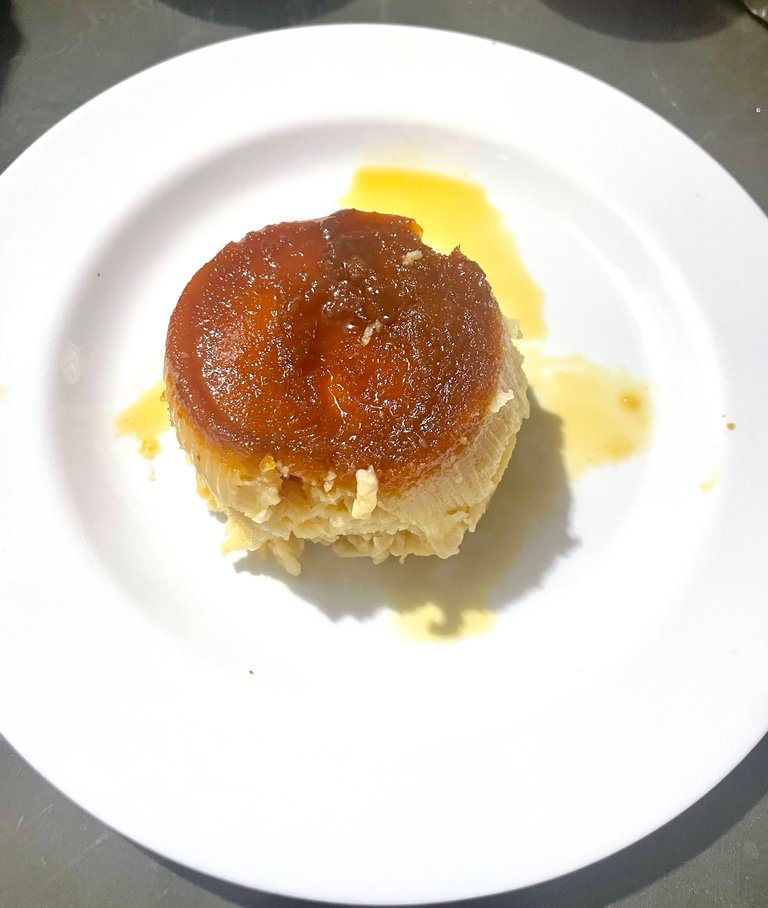
Retirar del horno y colocar a enfriar.
En este caso que estaba experimentando con los moldes individuales creció el quesillo así que les retiré lo sobrante y los voltee para tener una mejor apreciación y procedí a Taparlos con sus tapas de cartón

Hello dear community of @foodiesbeehive, greetings to all the members of this family who love and enjoy making delicious desserts.
Today I want to share a delicious recipe perfect for snacks, celebrations or birthdays, this is one of the typical sweets of our land Quesillo. Normally it is made in quesillo molds, however this time I used individual aluminum containers for gifts, they can also be commercialized. This recipe is wonderful because it is not only easy but also economical. They are very tasty. I know you are going to love them.
INGREDIENTS: for 7 servings
- 1 can (390 grams) of condensed milk
- 4 eggs at room temperature
- 300 ml milk
- 1 teaspoon vanilla
- 1 tablespoon of rum
For the Caramel
1/2 cup white sugar
1/4 cup water
PREPARATION:
Step 1:
In the blender cup we put all the ingredients the eggs, condensed milk the milk in my case I put water I added 2 teaspoons of milk, the rum and the vanilla we beat mix for about 3 minutes.
Step 2:
In a pot or pan over medium heat place the sugar and water to make a syrup until it begins to bubble and take a light amber color; once it begins to take color is easy to burn, so you can not lose sight of it and lower the fire before it gets too dark.
Step 3:
Pour the caramel over the cheesecake mold. This time I used individual aluminum containers, they cooled quickly because they were one by one and I placed them over the hot stove to spread it all over the mold and then let them cool.
Step 4:
It is time to bake , pour the mixture from the blender into the molds with the caramel, place an aluminum lid on each mold then Place the aluminum containers or those that use quesillera in a wider container, in my case I used another cake pan covering it in a bain marie in the oven and bake for 40 minutes to 1 hour.
Step 5:
Remove from the oven and place to cool.
In this case I was experimenting with the individual molds and the cheese grew so I removed the excess and turned them upside down to have a better appreciation and proceeded to put them in their cardboard lids.