¡Bienvenidos a mi rinconcito en Hive!
Antes que nada, les cuento que estuve ausente debido a que hice un curso intensivo de retratos de mascotas en acuarela que duró más de un mes y el cual absorbió gran parte de mi tiempo. Aunado a eso, mi trabajo con las tortas que ya saben que es bastante demandante y mi principal fuente de ingresos. ¡Ahora, a lo que vinimos!
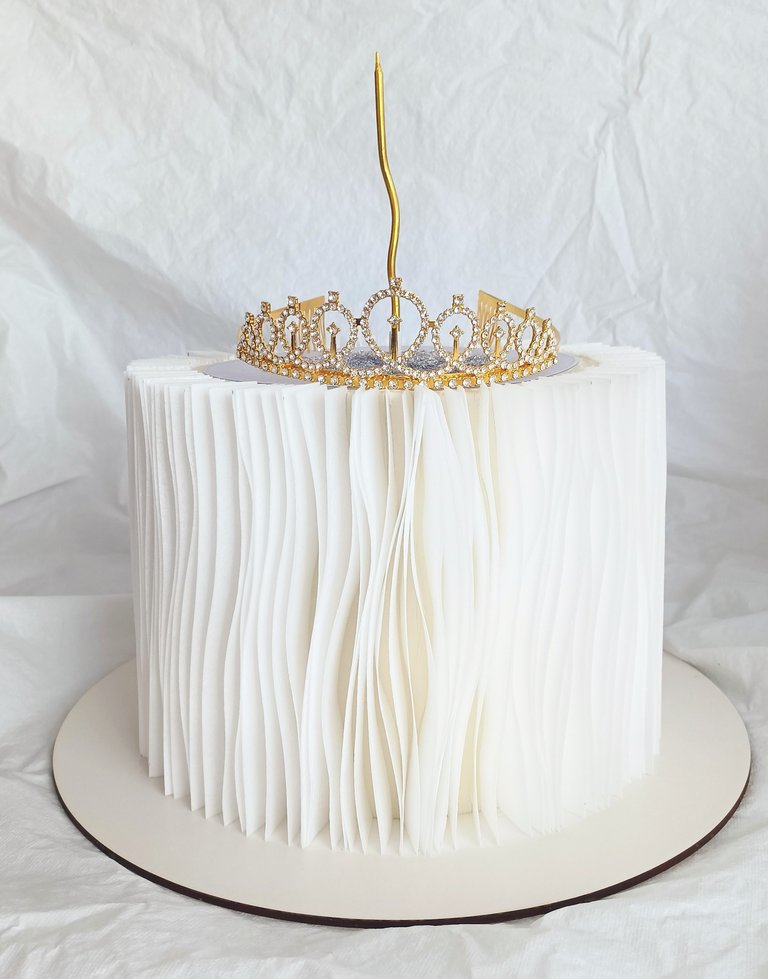
En la actualidad, ser repostera implica adaptarse a cambios, prácticamente vertiginosos, ya que casi todos los días ves en la redes sociales decoraciones de tortas que se vuelven virales y que todos quieren replicar en sus cumpleaños, pero en muy poco tiempo desaparecen dándoles paso a otra nueva tendencia y si eres repostera, pues de seguro será la próxima torta que te pedirán los clientes y así sucesivamente. Una de estas tortas que está en tendencia este 2025 es la que les traigo el día de hoy y de la cual les contaré un poco cómo yo la hice. Aunque, hace poco ví otra forma de hacerla que me pareció más práctica y les contaré al final.
Tengo un cliente que todos los años me encarga la torta de cumpleaños de su novia. A ella le gusta la torta red velvet, pero yo había dejado de hacerla, porque la FDA (Food and Drug Administration) prohibió el colorante rojo n° 3 E127, ya que según estudios con animales, este colorante en altas dosis puede causar cáncer de tiroides y este producto es uno de los ingredientes principales de la torta red velvet, así que para evitarme cualquier inconveniente, dejé de hacerla. Sin embargo, después de haberle explicado a mi cliente todo lo anterior, me dijo que esa era la torta que quería y bueno, quién soy para llevarle la contraria a mis clientes.
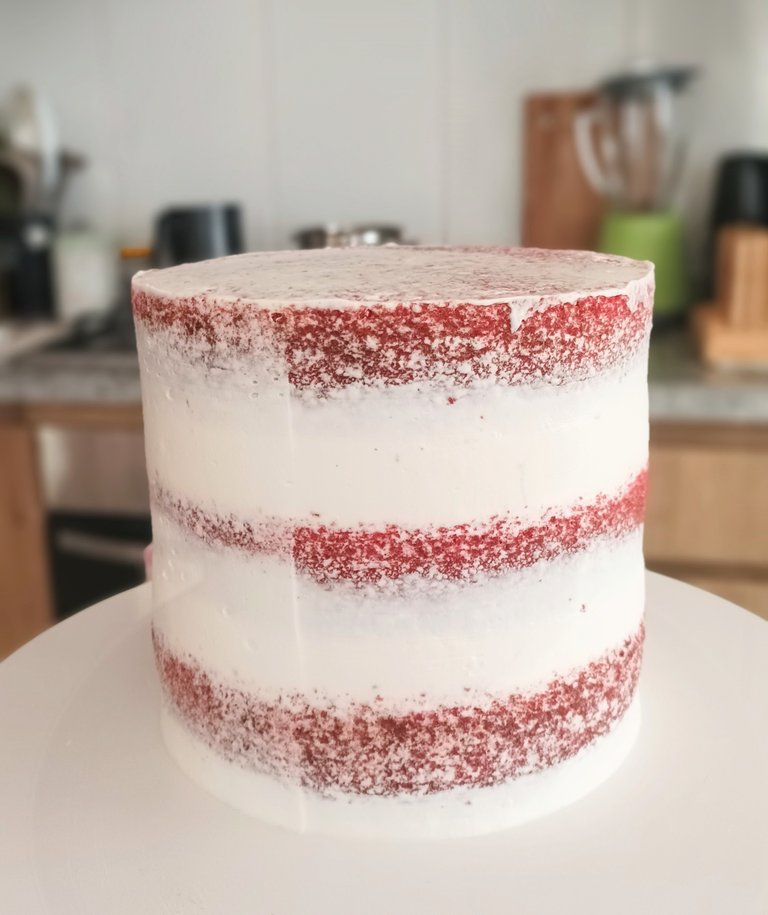
Después que definimos el tipo de torta que quería mi cliente, le pregunté cómo quería que estuviera decorada y pues, me envió una imagen de referencia con la torta que está en tendencia este 2025. Yo la verdad, es que nunca jamás en la vida había hecho esa torta, pero si había visto videos de como se hacía y para suerte tenía todos los materiales que necesitaba para decorar la torta, menos la corona, pero el cliente pagó para que la incluyera.
Para esta decoración se requiere tiempo y mucha paciencia, pero el resultado vale completamente la pena.
Vas a necesitar los siguientes materiales:
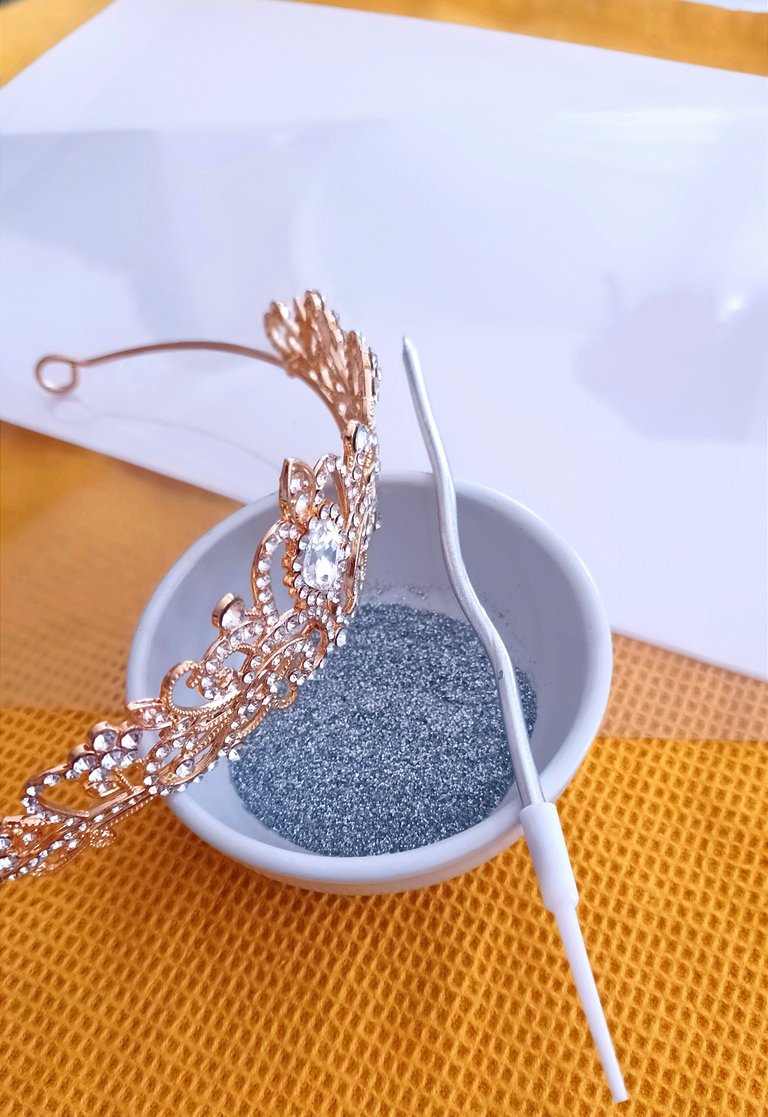
• Una torta con una cobertura de crema de mantequilla o ganache de chocolate blanco. La que yo hice medía unos 15 cm de alto y 18 cm de diámetro, aproximadamente.
• 8 hojas de papel de oblea.
• Brillantina plateada
• Matizador nacarado.
• Una hoja de acetato.
• Una tiara.
• Un cutter y una regla.
Nota: No recomiendo usar Chantilly ni frosting de queso crema para esta decoración ya que el papel de oblea se daña con la humedad.
Decoración:
Colocar la hoja de oblea de manera horizontal y marcar tiras de 2cm de ancho por 15 cm de largo.
Luego, cortar con cuidado usando la regla y el cutter para que te salgan todas del mismo tamaño y lo más parejas posibles, así como se muestra en el gif.
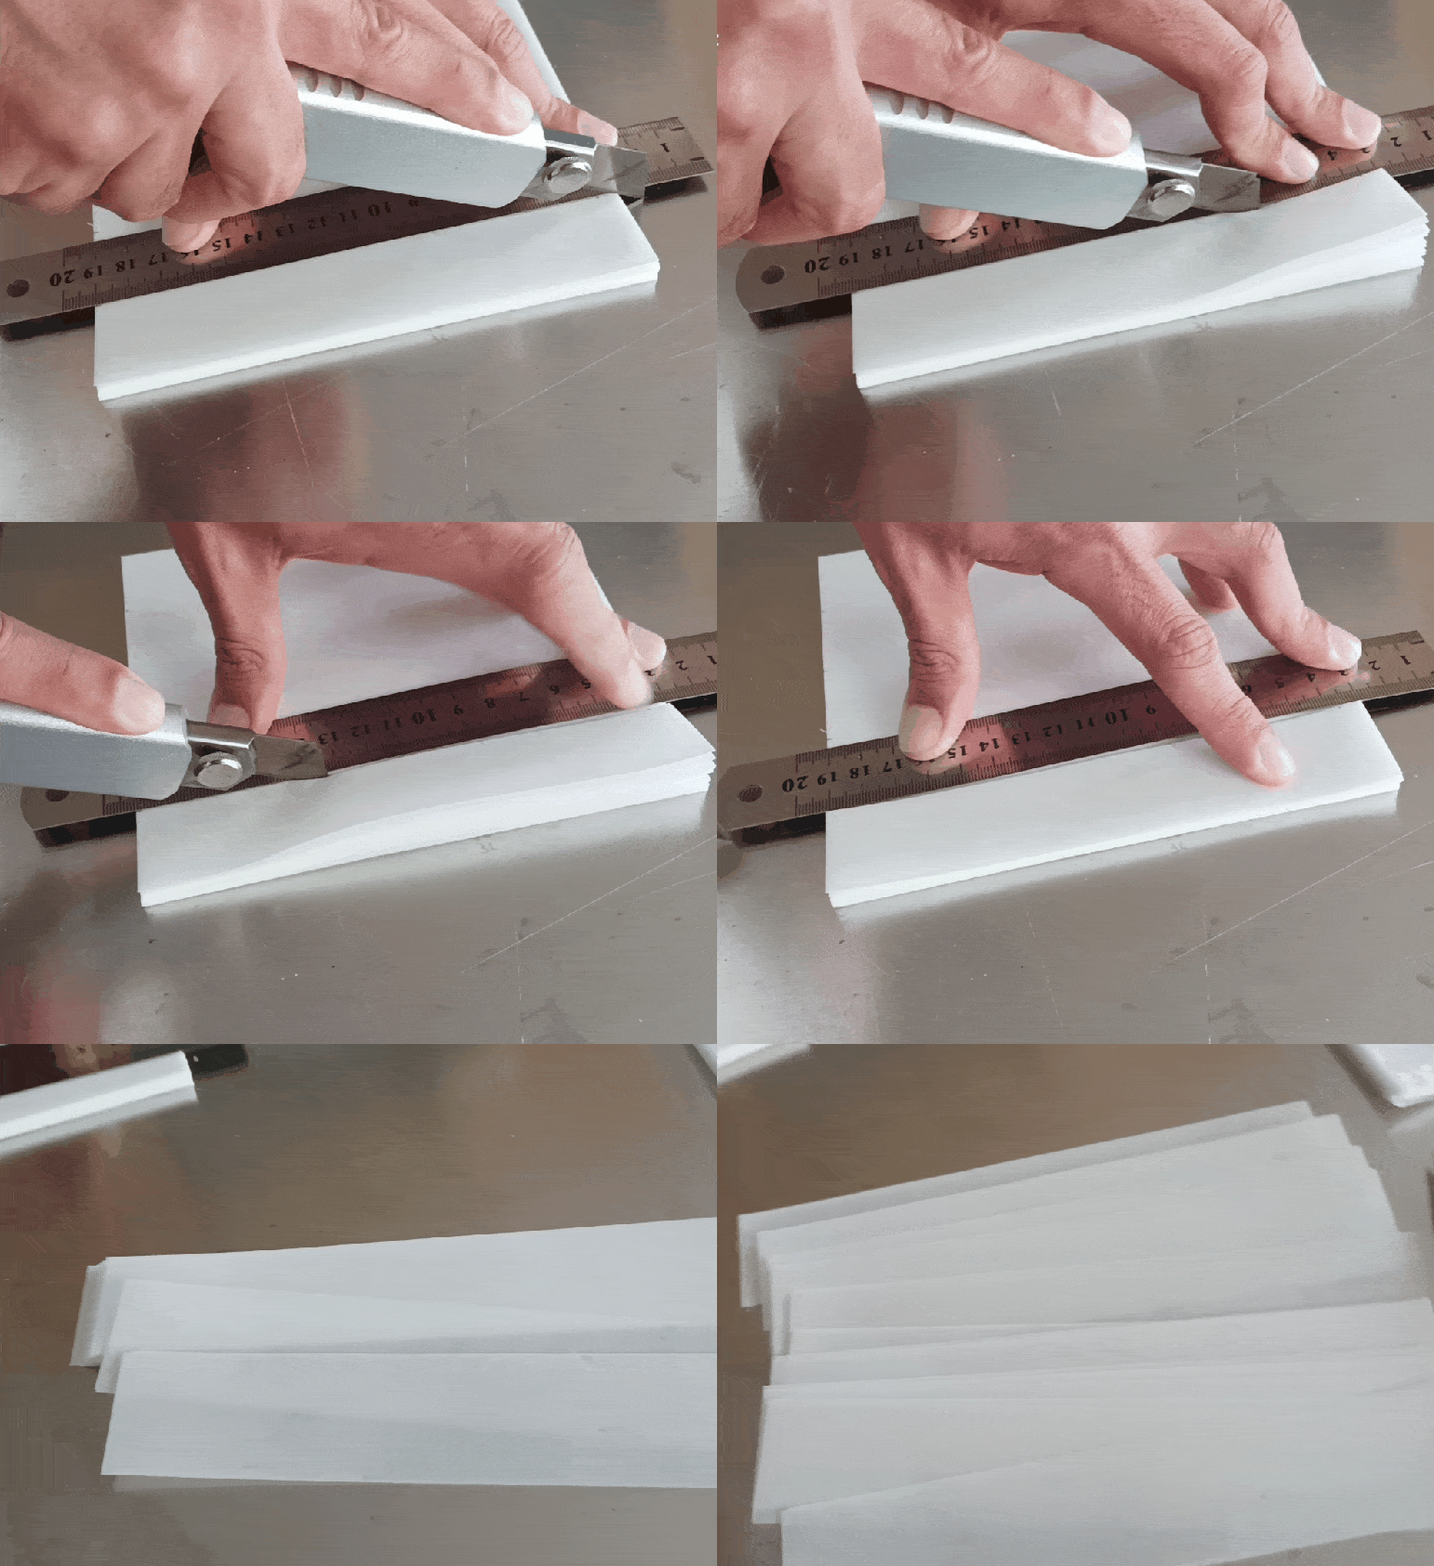
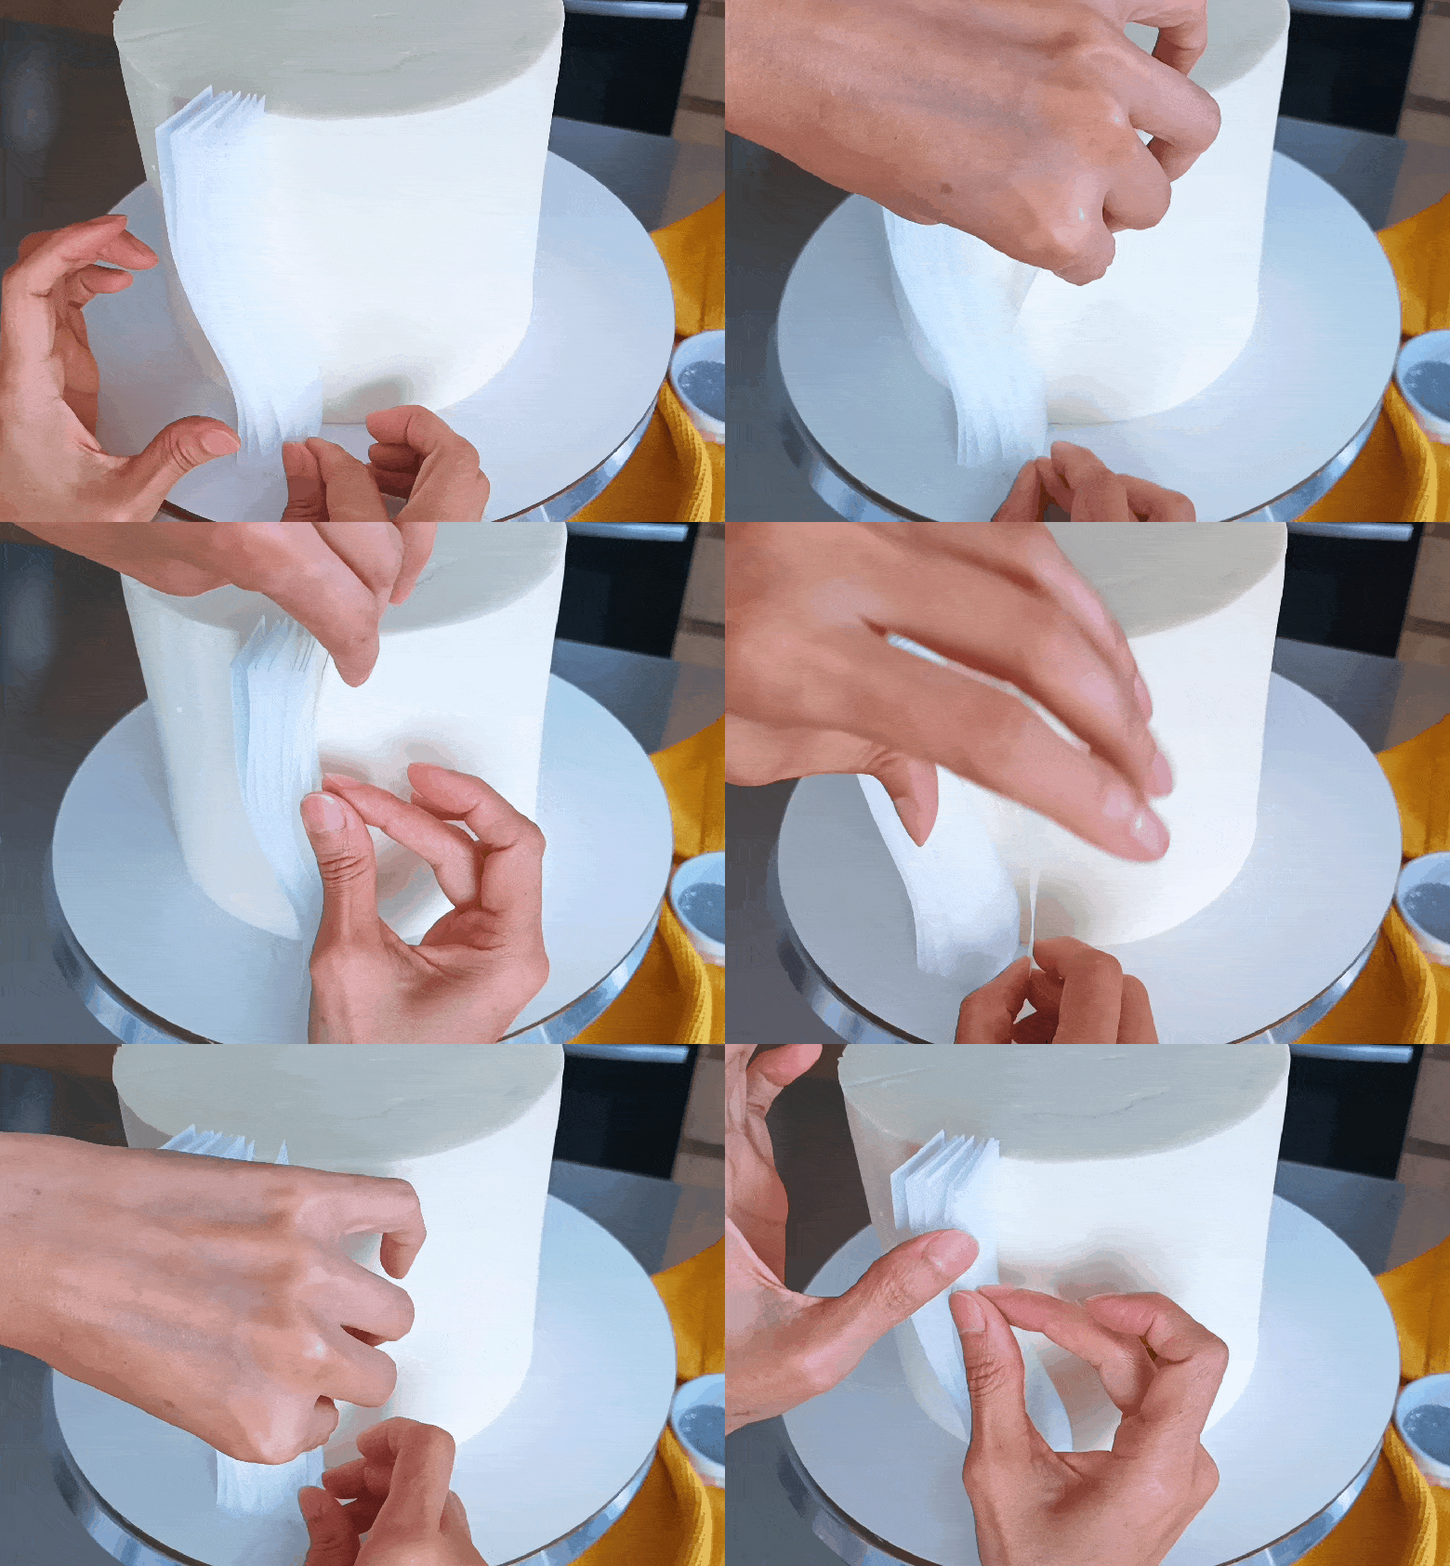
Cuando tengas todas las tiras cortadas, empezar simplemente a pegarlas sobre la torta sin necesidad de humedecer el papel de oblea.
Cuando hayas pegado todas las tiras, corta el acetato 2 cm menos que el diámetro de la torta y le haces un pequeño orificio en el centro para poder introducir la vela en la torta. Hecho ésto, colocarlo en la parte superior.
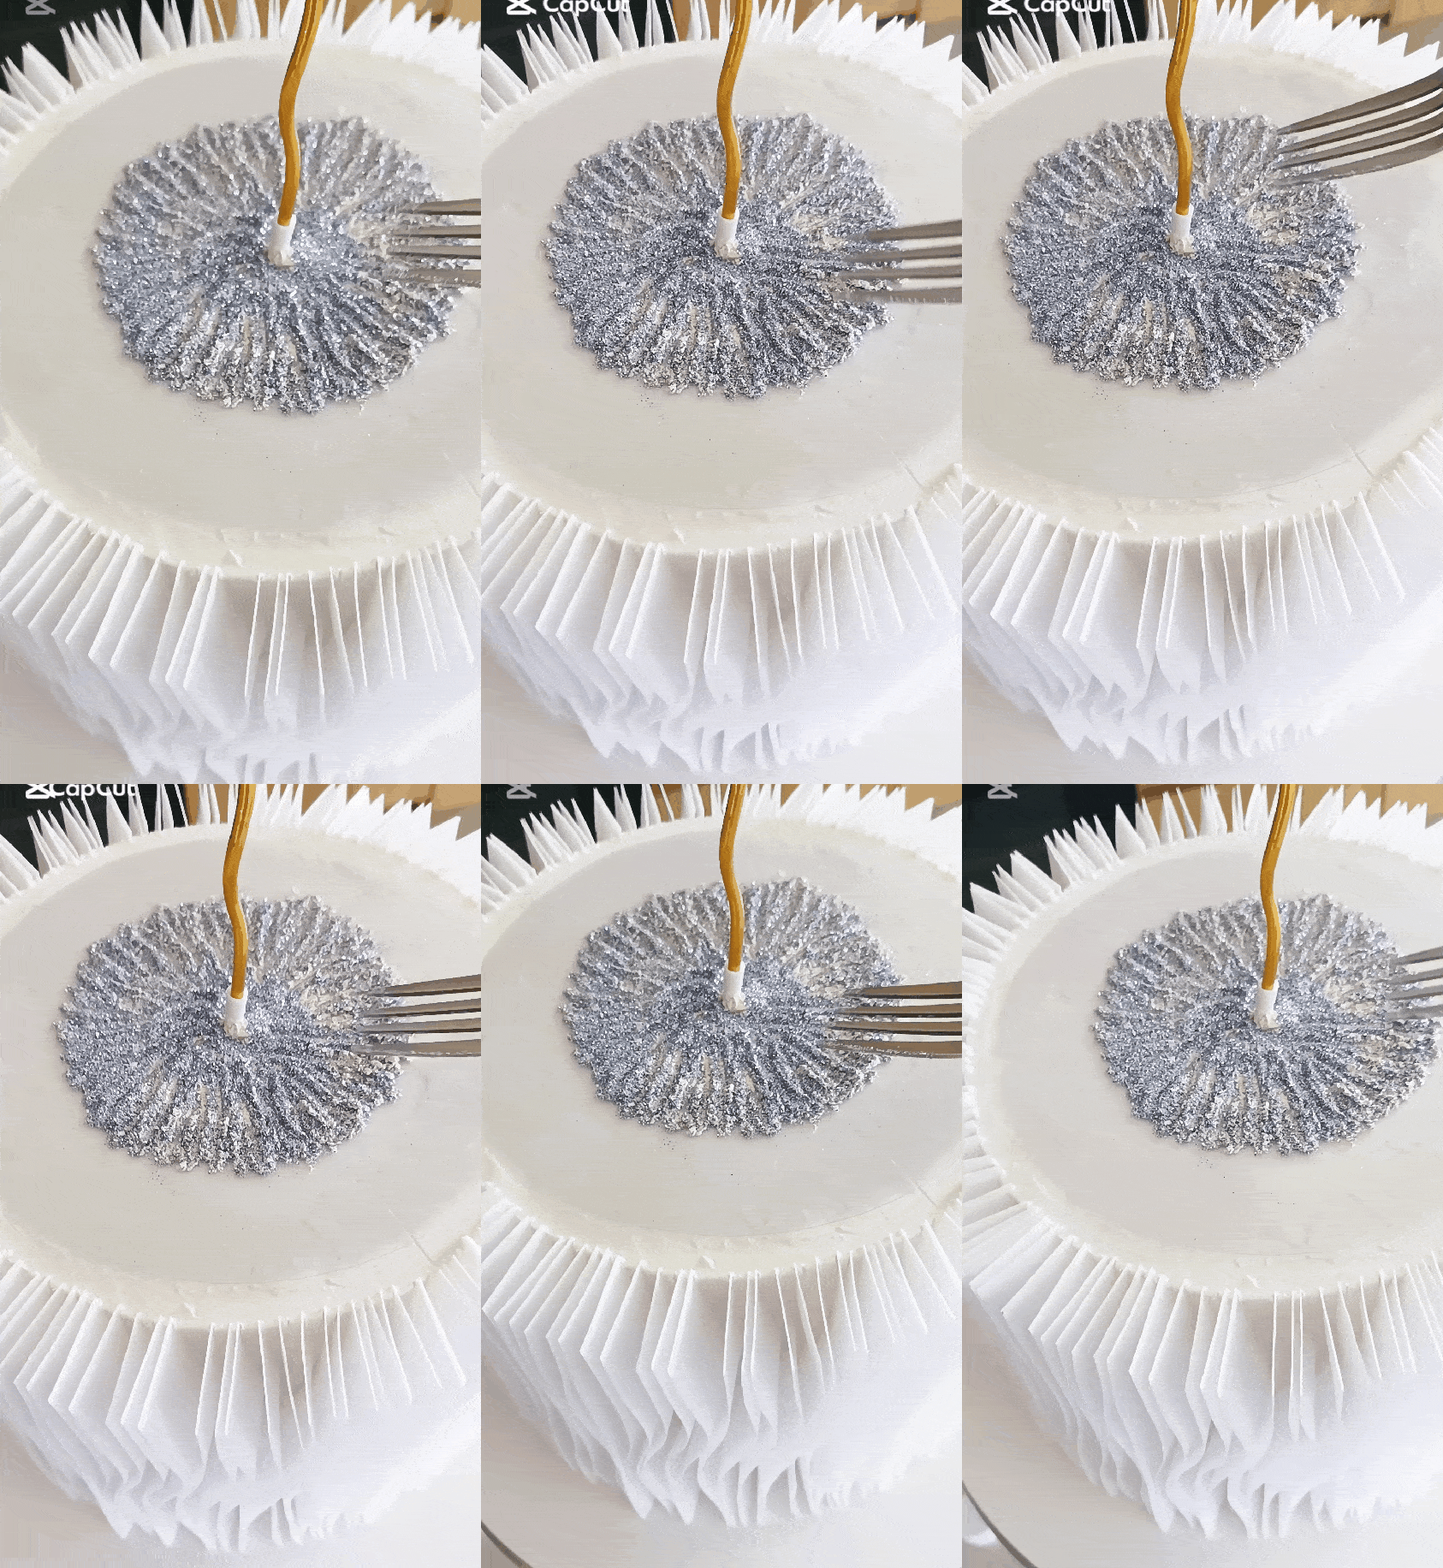
Agrega, con mucho cuidado, sobre el acetato la brillantina y el matizador.
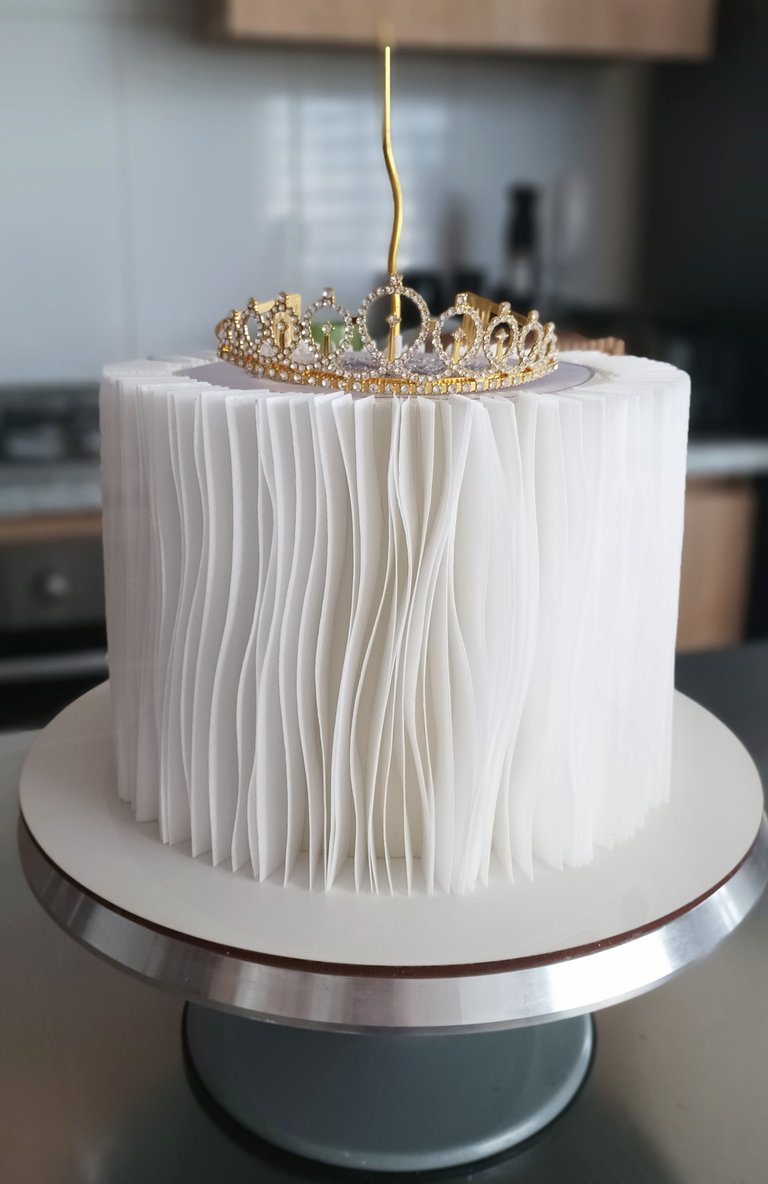
Finalmente, coronar la torta con la tiara.
Según mi experiencia, lo más difícil de este tipo de decoración es cortar las tiras y ponerlas una por una. Sin embargo, la otra forma de hacer esta decoración es colocando alrededor de toda la torta las hojas de oblea hasta cubrirla completamente y luego colocarles las tiras, dejando espacios más grandes entre ellas lo que permite que termines más rápido.
Creo que está torta sería el regalo ideal para una novia, una quinceañera o para mamá en su cumpleaños o en su día como es el Día de la Madre que es este domingo 11 de Mayo.
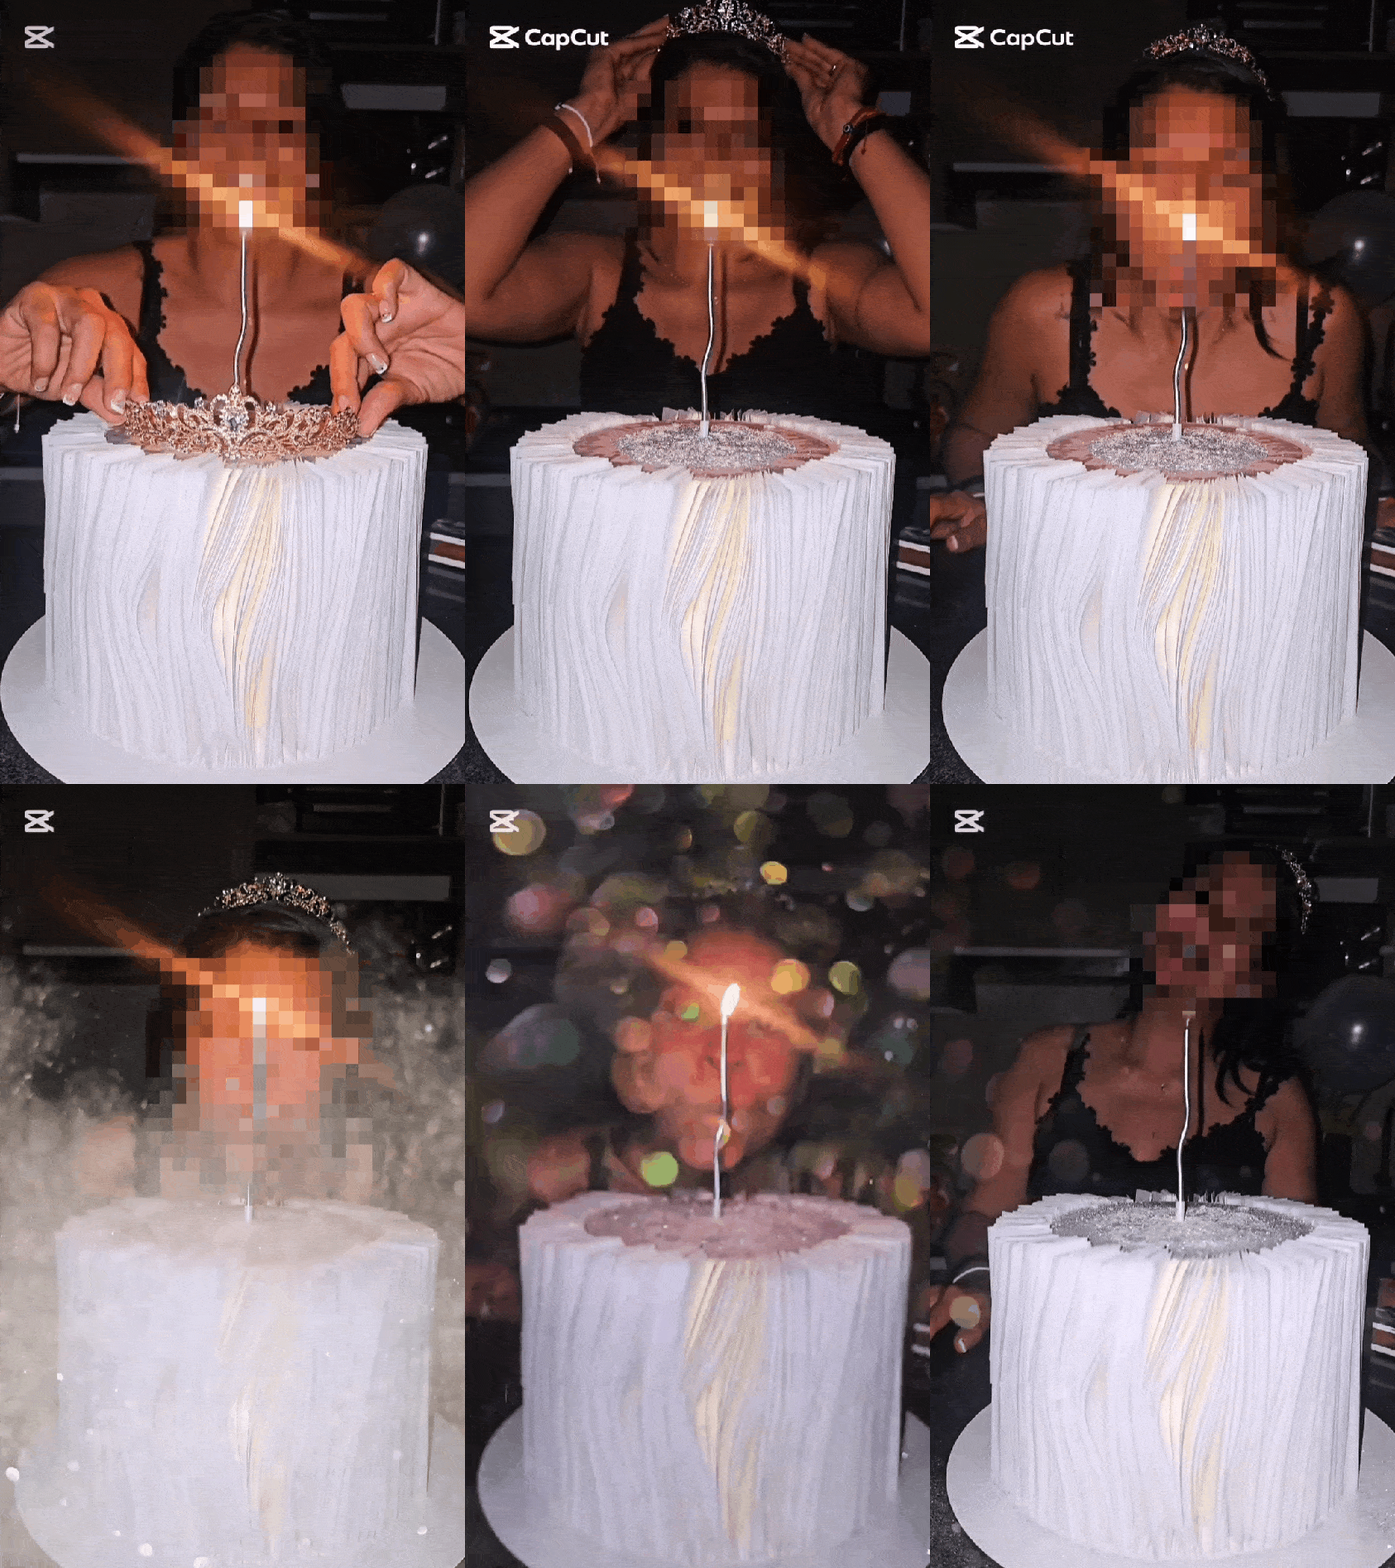
¡Gracias por acompañarme y por todo el apoyo!
¡Tu amiga, Zuuu!
ENGLISH


Welcome to my little corner on Hive!
First of all, I want to tell you that I was absent because I did an intensive course of pet portraits in watercolor that lasted more than a month and which absorbed much of my time. In addition to that, my work with the cakes, which you know is quite demanding and my main source of income. **Now, to what we came to!
Nowadays, being a pastry chef means adapting to changes, almost vertiginous, since almost every day you see on social networks cake decorations that become viral and that everyone wants to replicate on their birthdays, but in a very short time they disappear giving way to another new trend and if you are a pastry chef, it will surely be the next cake that customers will ask you for and so on. One of these cakes that is trending this 2025 is the one I bring you today and I will tell you a little about how I made it. Although, I recently saw another way of making it that I found more practical and I will tell you about it at the end.
I have a client who orders his girlfriend's birthday cake from me every year. She likes red velvet cake, but I had stopped making it, because the FDA (Food and Drug Administration) banned the red dye n° 3 E127, since according to animal studies, this dye in high doses can cause thyroid cancer and this product is one of the main ingredients of red velvet cake, so to avoid any inconvenience, I stopped making it. However, after I explained all of the above to my client, she told me that this was the cake she wanted and well, who am I to take my clients up on it.

After we defined the type of cake my client wanted, I asked her how she wanted it to be decorated and well, she sent me a reference image with the cake that is trending this 2025. The truth is that I had never ever made such a cake in my life, but I had seen videos of how it was made and luckily I had all the materials I needed to decorate the cake, except for the crown, but the client paid for it to be included.
This decoration takes time and a lot of patience, but the result is completely worth it.
You will need the following materials:

• A cake with a buttercream frosting or white chocolate ganache. The one I made was about 15 cm high and 18 cm in diameter, approximately.
• 8 sheets of wafer paper.
• Silver glitter
• Pearlescent shader.
• A sheet of acetate.
• A tiara.
• A cutter and a ruler.
Note: I do not recommend using Chantilly or cream cheese frosting for this decoration as the wafer paper is damaged by moisture.
Decoration:
Lay the wafer sheet horizontally and score strips 2cm wide by 15cm long.
Then cut carefully using the ruler and the cutter so that they are all the same size and as even as possible, as shown in the gif. as shown in the gif.

When you have all the strips cut, simply start gluing them on the cake without wetting the wafer paper.

When you have glued all the strips, cut the acetate 2 cm less than the diameter of the cake and make a small hole in the center to be able to insert the candle in the cake. Once this is done, place it on top.
Add, very carefully, on the acetate the glitter and the shading.

Finally, crown the cake with the tiara.

In my experience, the most difficult part of this type of decoration is cutting the strips and placing them one by one. However, the other way to do this decoration is to place around the whole cake the wafer sheets until they cover it completely and then place the strips on them, leaving bigger spaces between them which allows you to finish faster.
I think this cake would be the ideal gift for a bride, a quinceañera or for mom on her birthday or on her day as it is Mother's Day which is this Sunday May 11.

Thank you for joining me and for all the support!
Your friend, Zuuu!

All photos and videos in this post were taken with my Xiaomi Redmi 10 cell phone.
Resources: DeepL Translator, Capcut and Gifty (Free Versions).
Posted Using INLEO

