Hola amigos de la comunidad más creativa de Hive. Es domingo y pues bueno, después de haber ido a misa, haber almorzado en familia como siempre acostumbramos a hacer, haber disfrutado el postre y haber llegado el ya normal apagón, no queda más nada por hacer.
Cara de aburrimiento
Ayer me regalaron un set de pinceles profesionales, pero hoy se me dificulta un poco pintar, entonces quería hacer algo, pero no se me ocurría qué... Entonces recordé que debía terminar el regalo de cumpleaños de una de mis alumnas más pequeñas que cumplió años el mes pasado y pues; ¡manos a la obra!
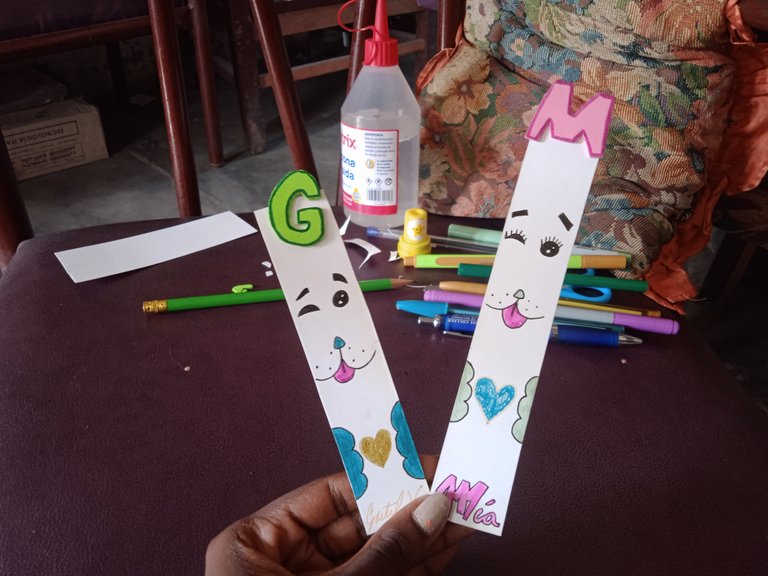
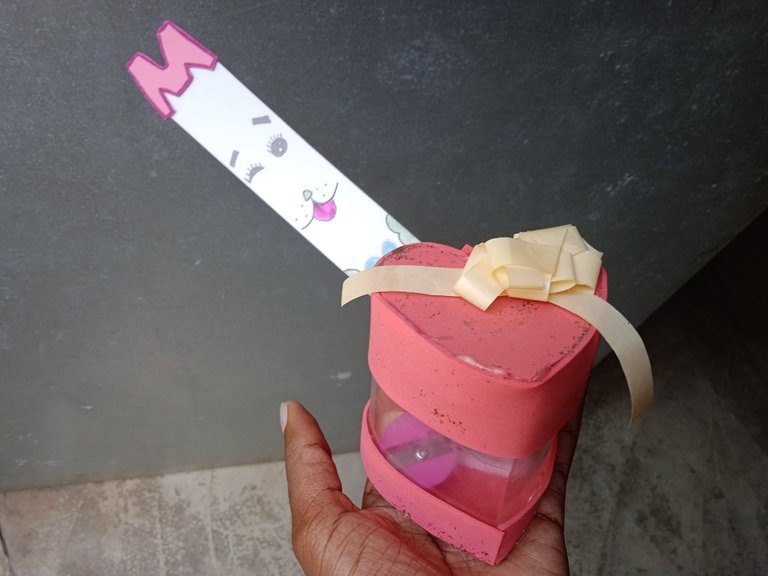
Para ella tenía un cofre hecho con la mitad de una botella plástica y tapa y fondo de foami, pero faltaba agregarle el lazo de la parte superior y añadir otra cosa para que sirviera de complemento. Entonces decidí hacer un marcador, porque ella está empezando a leer y necesita marcar la página última que leyó. El que hice para ella es el de la foto de presentación, entonces les compartiré el que hice para mí, ya que estoy próxima a comenzar un nuevo libro.
Paso a paso
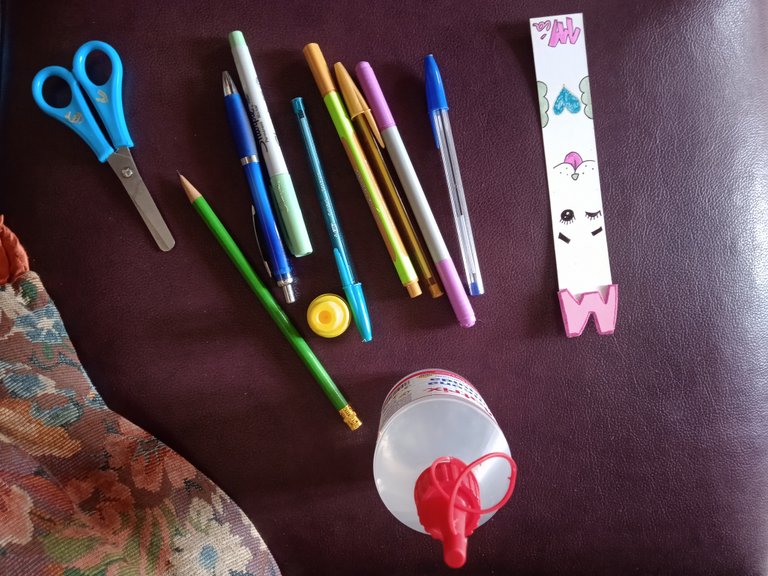
Primero seleccionas los materiales a usar. En mi caso usé
- lapiceros de colores
- una cartulina
- silicona líquida
- tijera
- foami
- lápiz
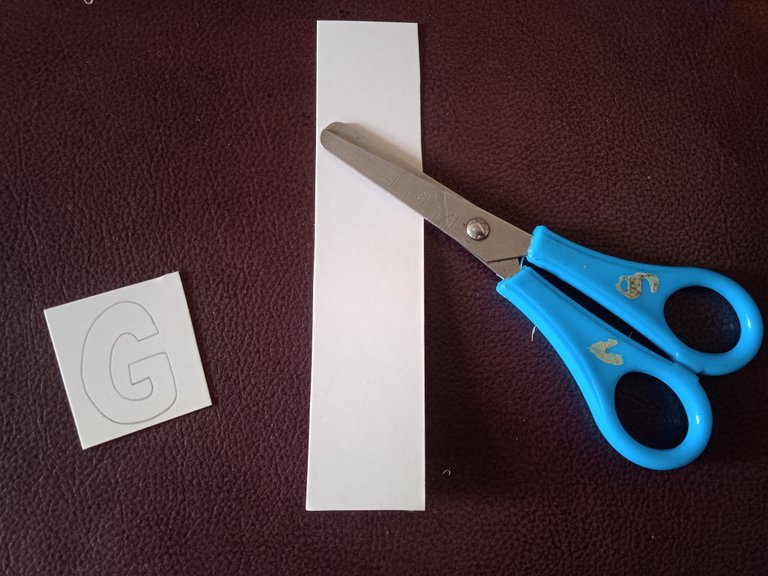
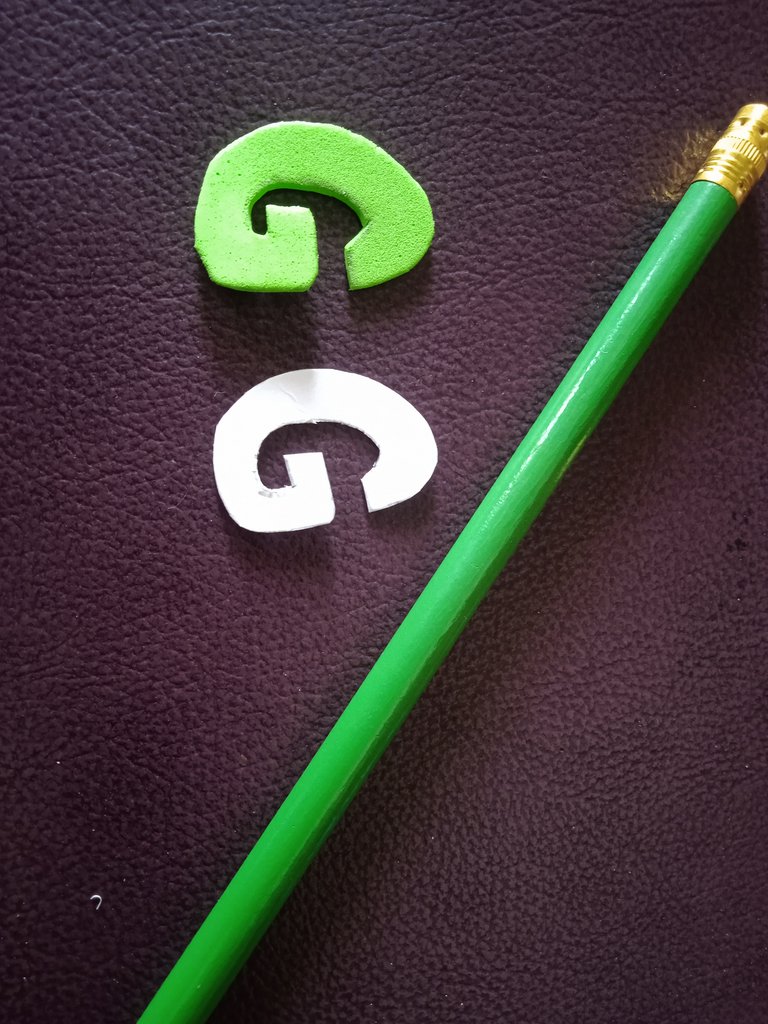
Comencé recortando la forma del marcador y un cuadrado pequeño para dibujar la letra inicial de mi nombre como plantilla. Luego recorté el dibujo de la letra y lo dibujé nuevamente en la hoja de foami. Yo tenía verde claro y verde oscuro, elegí el claro, porque es mi color favorito. Ustedes pueden elegir, que con cualquier color quedará bien.
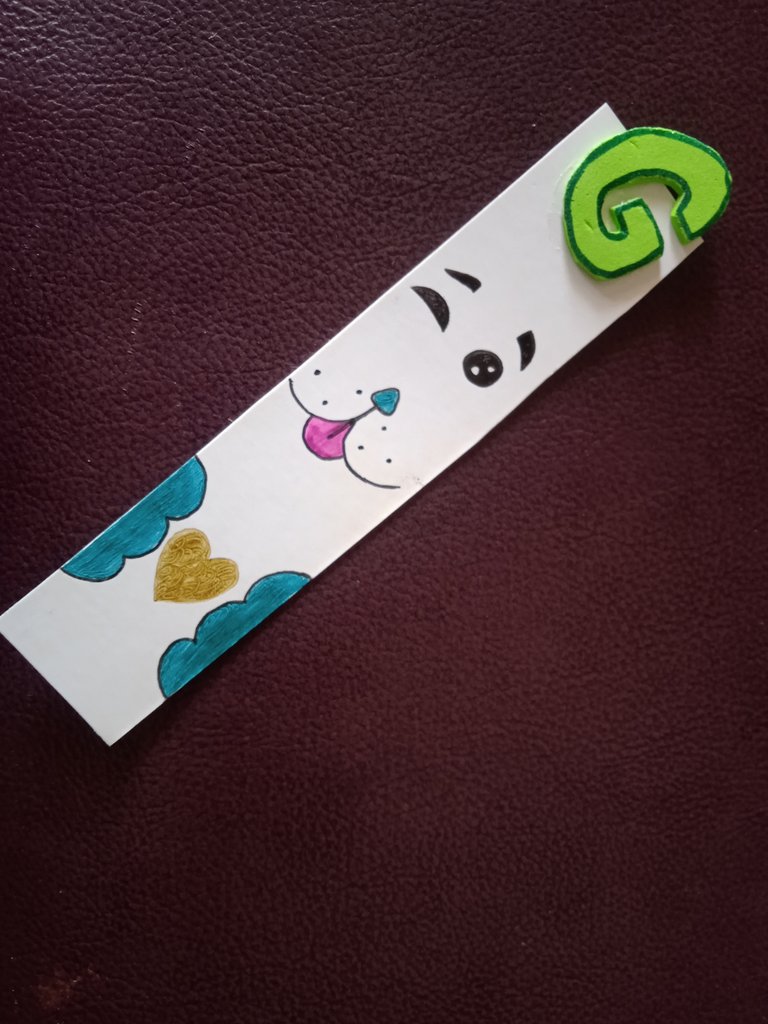
Entonces recorté la inicial de foami para después hacer el diseño del marcador. Primero lo hice a lápiz para poder borrar si me equivocaba, y cuando estuve convencida repasé el dibujo con mis lapiceros y los colorié.
Para finalizar pegué la inicial de foami en la parte superior del marcador y listo, ya está.
Yo dibujé un perrito, porque me gustan esos animalitos, pero se puede dibujar un osito, un unicornio, peces, flores, un árbol... Lo que ustedes decidan. Es algo sencillo de hacer, solo deben dejar volar la imaginación. Además de ser un buen regalo para una niña de primer grado, es una forma de consentir el gusto individual por la lectura al hacerlo nosotros mismos según nuestros propios gustos y preferencias.
Aquí les muestro el regalo completo. Dentro del cofre hay felpas pequeñas y un sacapuntas, y además el marcador.
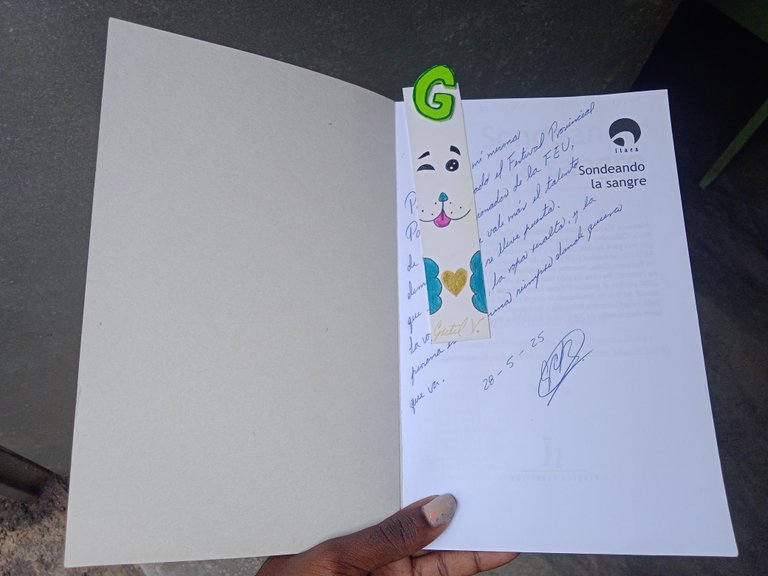
También les muestro cómo se ve mi marcador en la primera página de mi libro, esperando a que sea su turno.
Gracias por leer, espero les haya sido útil este tutorial de domingo y sobre todo que puedan hacerlo, ya que es bien sencillo.
Con cariño: Vicky ❤️
English Version
Hello friends of the most creative community on Hive. It’s Sunday, and well, after going to mass, having lunch with my family as we always do, enjoying dessert, and the now usual power outage arriving, there’s nothing left to do.
Bored face
Yesterday, I was gifted a set of professional paintbrushes, but today I’m finding it a bit difficult to paint. So, I wanted to do something, but I couldn’t think of what... Then I remembered I needed to finish the birthday gift for one of my youngest students, who had her birthday last month—so, let’s get to work!
For her, I had a chest made from half a plastic bottle with foam for the lid and base, but it still needed the bow on top and something else to complement it. So, I decided to make a bookmark since she’s just starting to read and needs to mark the last page she read. The one I made for her is in the cover photo, so I’ll share the one I made for myself, as I’m about to start a new book soon.
Step by Step
First, select the materials you’ll use. In my case, I used:
- Colored pens
- Cardstock
- Liquid silicone
- Scissors
- Foam sheet
- Pencil
I started by cutting out the shape of the bookmark and a small square to draw the initial letter of my name as a template. Then, I cut out the letter and traced it again onto the foam sheet. I had light green and dark green—I chose the light one because it’s my favorite color. You can pick any color; it’ll turn out nice.
Next, I cut out the foam initial to then design the bookmark. First, I sketched it in pencil so I could erase if I made a mistake, and once I was satisfied, I traced the drawing with my colored pens and filled it in.
To finish, I glued the foam initial to the top of the bookmark, and that’s it—done!
I drew a little dog because I like those little animals, but you could draw a bear, a unicorn, fish, flowers, a tree... whatever you decide. It’s simple to make—just let your imagination fly. Besides being a great gift for a first-grade girl, it’s also a way to indulge your own love for reading by making it yourself according to your tastes and preferences.
Here’s the complete gift. Inside the chest, there are small pompoms and a pencil sharpener, plus the bookmark.
I also show you how my bookmark looks on the first page of my book, waiting for its turn.
Thanks for reading! I hope this Sunday tutorial was helpful, and most importantly, that you can make one too—it’s really simple.
With love: Vicky ❤️