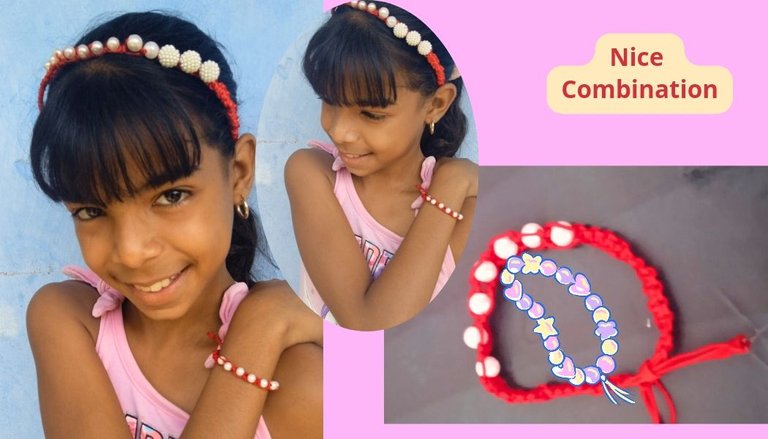

Greetings to everyone and especially to those of this beautiful #Jewerly community, where today I have the pleasure of publishing again.
Recently I had the opportunity to show you how I repaired my daughter's headband, and thanks to the skills that mothers have to solve our children's problems, she can repair the headband, but today I come to show you a bracelet that I made for her in combination with the headband, since she is very flirtatious and likes to be combined.
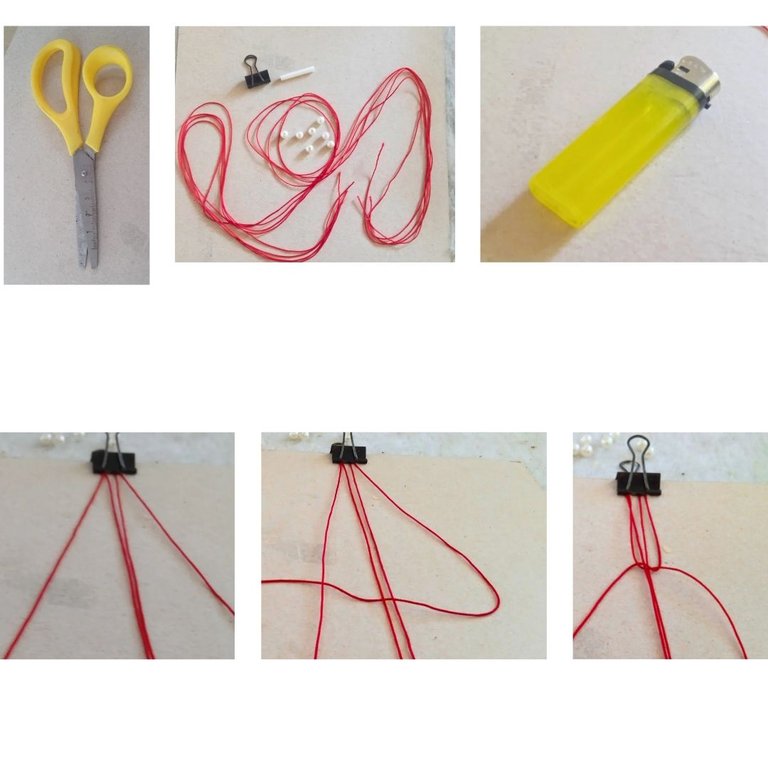
To make the bracelet I used the following materials.
- 5 Meters of red Chinese thread.
- 7 white pearls.
- 1 Scissors.
- 1 Matchbox
- 1 loop
- 1 plastic tube.
- 1 carton.

Un saludo para todos y en especial a los de esta linda comunidad de #Jewerly, donde hoy tengo el placer de publicar nuevamente.
Recientemente tuve la oportunidad de mostrar le como reparaba el cintillo de mi hija,y gracias a las habilidades que tenemos las madres de para resolver los problemas de nuestros hijos, puede reparar el cintillo, pero hoy Le vengo a mostrar una pulsera que le hice en combinación con el cintillo, ya que es muy coqueta y le gusta estar combinada.
Para hacer la pulsera utilicé los siguientes materiales.
- 5 Metros de hilo chino rojo.
- 7 Perlitas blanca.
- 1 Tijera.
- 1 Fosforera
- 1 presilla
- 1 tubito plástico.
- 1 cartón.
Step by Step.
I begin by attaching the clip to the cardboard with which I am going to hold the ends of the four strands of thread with which I am going to make the weaving.
I begin to organize the threads, one for the right side, one for the left and two in the center.
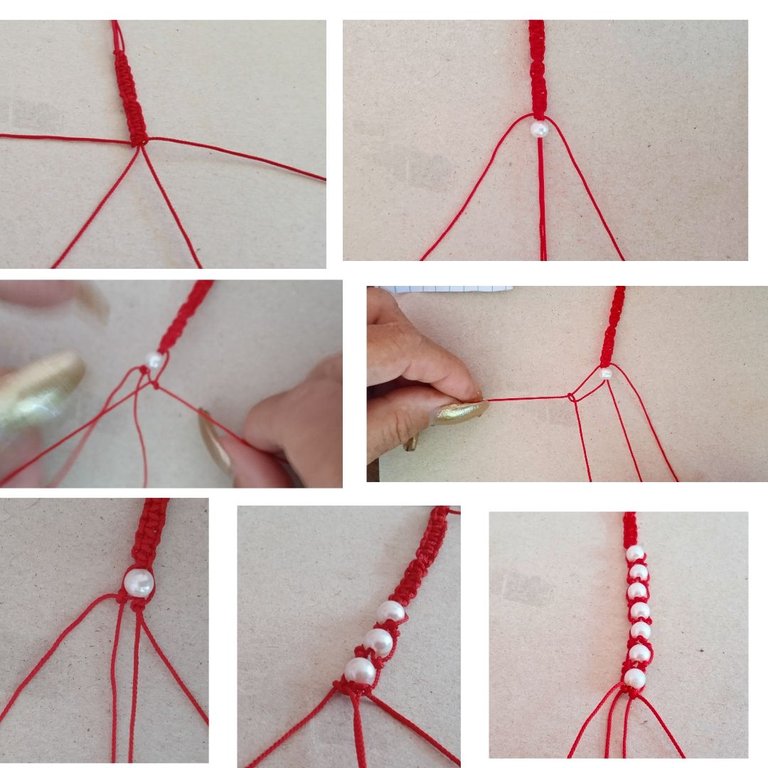
The outer threads are the ones that weave, with the right side we make a semi-circle and with the right side we pass it underneath and it comes out through the semi-circle and the first stitch is closed and so we continue advancing with the same stitch.which is known as a flat point or mark me point.
Then I began to put the pearls on the two middle threads and then two knots were made with the right outer thread and one of the middle threads through which the pearl passes. And now I do the two knots but on the left side. And I put another pearl on the two threads in the center and repeat the entire process with all the pearls.This is the point known as a double knot.
Paso a paso.
Comienzo fijando la presilla al cartón con el cual voy a sujetar las puntas de las cuatro hebras de hilo con que voy a realizar el tejido.
Empiezo a organizar los hilos uno para el lado derecho, otro para el izquierdo y dos en el centro.
Los hilos exteriores son los que tejen, con el lado derecho hacemos un semi circulo y con el lado derecho lo pasamos por debajo y sale por el semi circulo y se cierra el primer punto y así seguimos avanzando con el mismo punto, el cual se conoce como punto plano o punto marcarme.
Luego empecé a poner las perlitas por los dos hilos del medio y entonces se hace dos nudos con el hilo exterior derecho y uno de los hilo del medio por donde pase la perla. Y ahora hago los dos nuditos, pero del lado izquierdo. Y vuelvo a poner otra perlita por los dos hilos del centro y a repetir todo el proceso con todas las perlitas. Este es el punto conocido como doble nudo.
Continuo con el punto macrame hasta para completar la parte de la pulsa que faltaba por tejer, y lo medimos para que queden las dos partes iguales.
Una vez terminada la pulsa vamos a pasar a la parte del cierre que también es muy importante y para este realicé el punto llamado siete nudos.
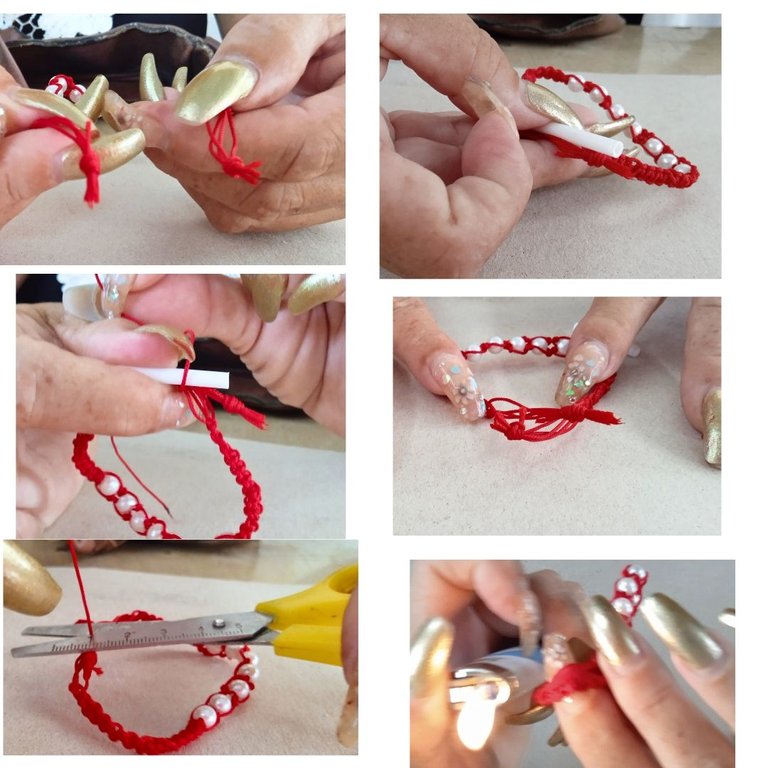
Para realizar este punto tomo el tubito plástico y lo coloco horizontalmente cerca de un extremo de la pulsa y con el quinto hilo le doy siete vueltas al tubito y alas pintas y luego, introduzco la punta del hilo por dentro del tubito y lo retiro con mucha delicadeza y con la llena de los dedos termino la forma del nudo.
I continue with the macrame stitch until completing the part of the pulse that was left to knit, and we measure it so that the two parts remain equal.
Once the pulse is finished, we are going to move on to the closing part, which is also very important and for this I made the point called seven knots.
To make this stitch I take the little plastic tube and place it horizontally near one end of the pulse and with the fifth thread I turn the little tube seven times and then, I insert the tip of the thread inside the little tube and remove it with great care. Delicacy and with the fullness of my fingers I finish the shape of the knot.
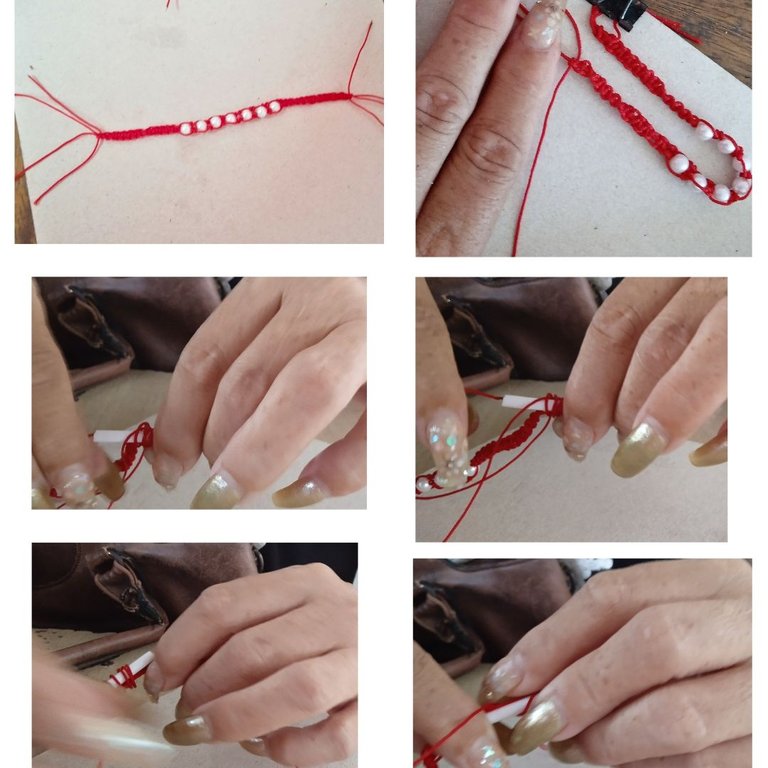
Una vez realizado los nudos en ambas puntas, voy a realizar el mismo nudo como cierre de la pulsera, ya que es un nudo muy seguro y permite que se deslice la pulsera para ambos lados.
Finalmente utilizo la tijera para cortar todos los hilos sobrante y con ayuda de la Fosforera quemo las puntas para cellar los nudos.
Once I have made the knots on both ends, I am going to make the same knot as the closure of the bracelet, since it is a very secure knot and allows the bracelet to slide on both sides.
Finally I use the scissors to cut all the excess threads and with the help of the Matchstick I burn the ends to close the knots.
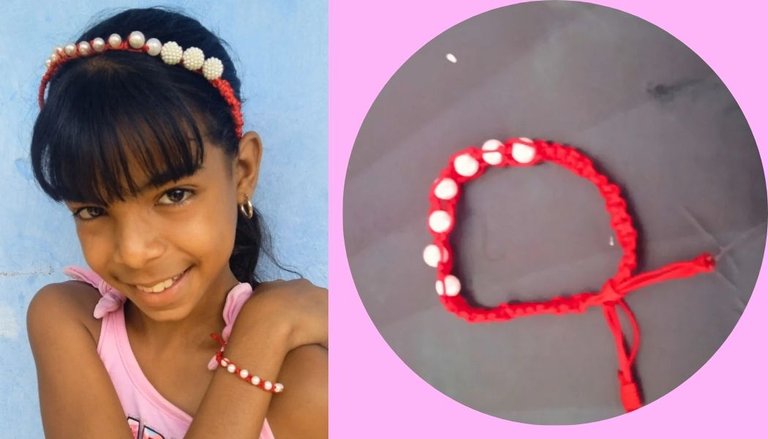
Este es el resultado final de mi trabajo, espero que le haya gustado tanto como a mí y a mi niña,
Espero que me lo dejes saber en los comentarios y solamente me queda desearles una linda tarde y un feliz fin de semana ♥️🙏🌹, hasta la próxima. 👋👋.
This is the final result of my work, I hope you liked it as much as me and my daughter,
I hope you let me know in the comments and I can only wish you a nice afternoon and a happy weekend ♥️🙏🌹, until next time. 👋👋.
The photos were taking by me with my pnone and editated with
Las fotos fueron tomadas por mi teléfono y editadas en
canva
