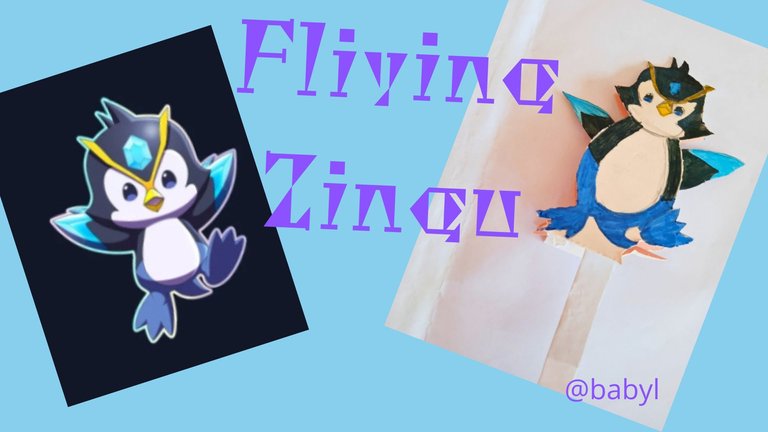
Holo Hivers,👋👋 cada día me siento más cautivada por las nuevas criaturas de esta comunidad y esta vez el pequeño pingüino Zingu 🐧🐧no solo me motivo a mi, sino también a mi pequeña hija Wendy, que desde que lo vio me dijo que le había gustado mucho y que iba hacer un pingüino volador 🐧🐧y realmente lo logró poniendo mucho empeño, dedicación y creatividad.
Ahora les muestro como lo realizó.
Holo Hivers,👋👋 every day I feel more captivated by the new creatures of this community and this time the little penguin Zingu 🐧🐧not only motivated me, but also my little daughter Wendy, who since she saw him told me that He had really liked it and that he was going to make a flying penguin 🐧🐧 and he really achieved it by putting a lot of effort, dedication and creativity.
Now I show you how he did it.

Materiales
- 1 Cartulina blanca de 24cm X 22cm.
- 1 Portaminas.
- 1 Regla.
- 4 Plumones.
- Pegamento en vara.
Materials
- 1 white cardboard of 24cm X 22cm.
- 1 Mechanical pencil.
- 1 Ruler.
- 4 Feathers.
- Glue stick.
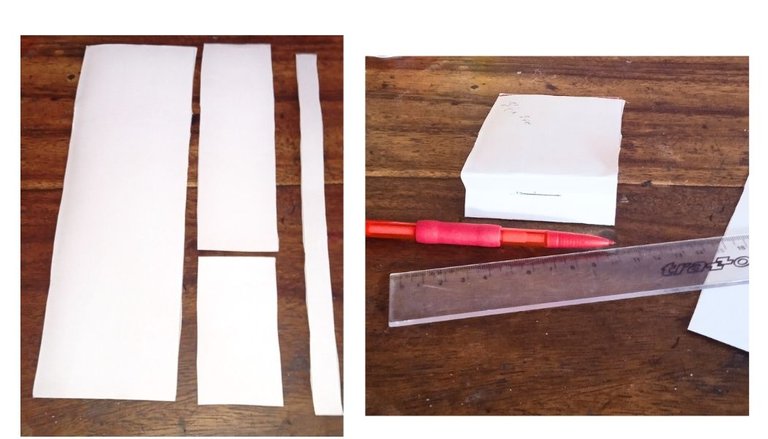
Para comenzar marcamos la cartulina con diferentes medidas 24cm X 8cm,en esta parte se dibuja el pingüinito, 12cm x 4cm,aquí dibujamos las alas de Zingu, otra parte importante es la parte interna que es la que permite que las alas se muevan y para eso marcamos otra dos piezas más, una de 8cm X 4cm y la otra de 12cm X 1cm,y luego recortamos con ayuda de la tijera.
La pieza más grande la doblamos a la mitad y luego le hacemos otro dobles hacia adentro y en el medio marcamos 1 cm para cada lado todo esto con ayuda de la regla y el portaminas, y luego realizamos un pequeño corte.
To begin, we mark the cardboard with different measurements 24cm That's why we mark two more pieces, one measuring 8cm X 4cm and the other measuring 12cmx 4cm, here we draw Zingu's wings, another important part is the internal part which is what allows the wings to move and for that we mark two more pieces, one of 8cm X 4cm and the other of 12cm X 1cm, and then we cut with the help of scissors.
We fold the largest piece in half and then we make another double inwards and in the middle we mark 1 cm for each side, all this with the help of the ruler and the mechanical pencil, and then we make a small cut.
 )
)
 )
)
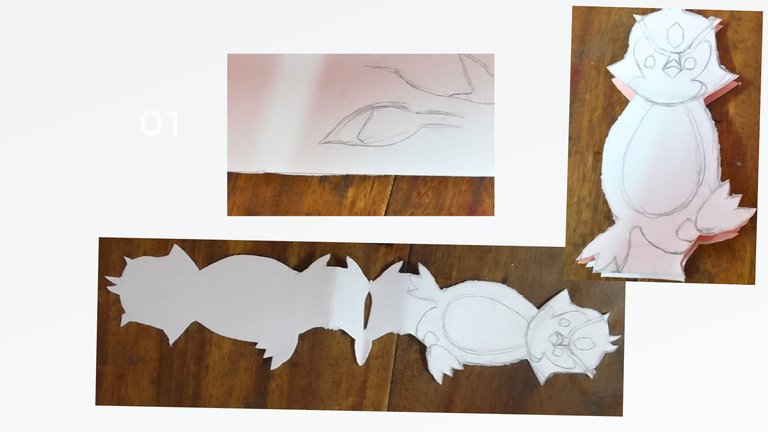
Continuamos dibujando a nuestros nuevo amigo sin las alas, ya que van aparte, recortamos y al abrir el cartón quedan dos, una imagen por delante y por detrás unidos por la base y con el corte en el medio.
El próximo paso es el más complejo y el más importante porque es el que va a permitir que las alas se muevan.
Tomma la pieza que mide 8 cm X 4 cm, la doblamos a la mitad, las esquina la doblamos hacia adentro y volvemos a doblar a la mitad, en la base se le realiza un pequeño corte.
We continue drawing our new friend without the wings, since they go apart, we cut out and when we open the cardboard there are two left, an image in front and behind joined at the base and with the cut in the middle.
The next step is the most complex and the most important because it is the one that will allow the wings to move.
Take the piece that measures 8 cm X 4 cm, fold it in half, fold the corner inwards and fold it in half again, make a small cut at the base.
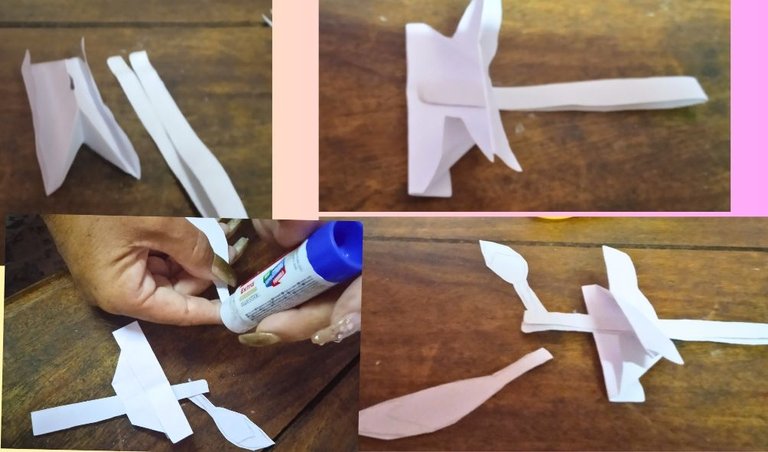

Seguimos trabajando en el movimiento de las alas, ahora doblamos a la la tira que mide 12cm X 1cm y la introducimos por el orificio que recién realizamos y le pegamos las alas, tomamos el pingüiinito y le pegamos por la parte de adentro la base donde van las alas y pasamos por el orificio del patrón del pingüino la tira que ya está acoplada a las alas y ceramos las dos parte del pingüino para que se vea uno solo, y no se vea todo lo que anteriormente hicimos.
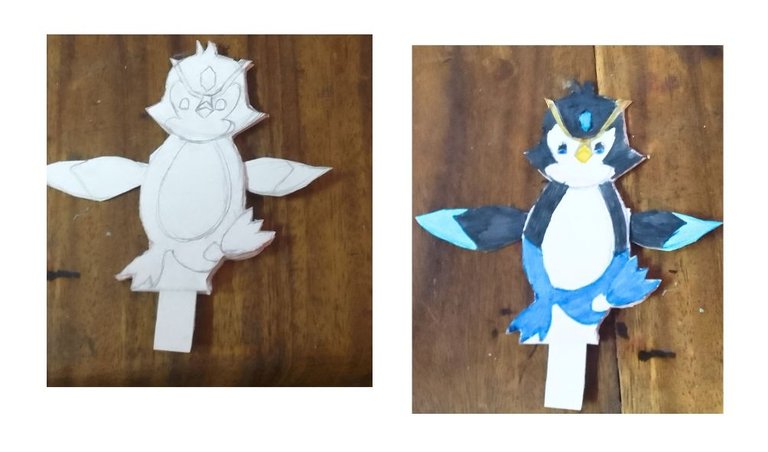
Empezamos a colorear nuestro lindo Zingu con los plumones dándole azul fuerte en sus patas y colas, negro en la parte externa del abdomen, parte inferior de las alas y borde externo de la cara y toda la cabeza, no pude faltar su linda diadema azul con su tiara dorada, los ojos negros y azules y su pico amarillo.
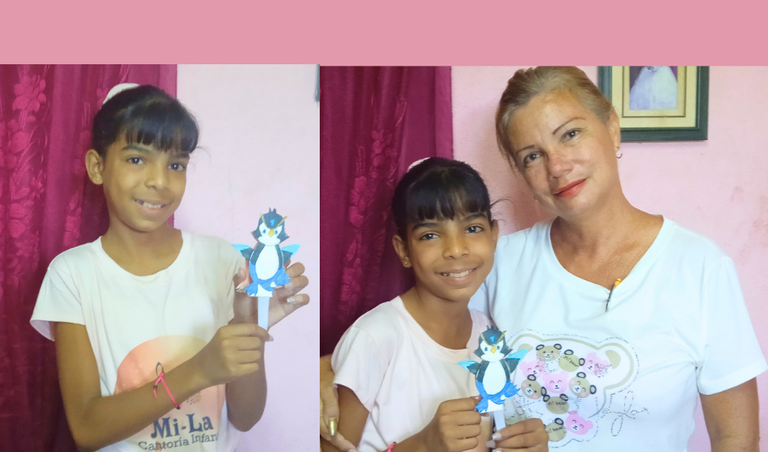
Y este es el resultado final de nuestro Zingu volador, les comento que aprendí mucho con mi niña pequeña haciendo este lindo trabajo y ella quedó súper contenta.
We started to color our cute Zingu with the markers giving him strong blue on his legs and tails, black on the outside of the e abdomen, lower part of the wings and outer edge of the face and the whole head, I could not miss his cute blue headband with his golden tiara, the black and blue eyes and his little yellow.
And this is the final result of our flying Zingu, I tell you that I learned a lot with my little girl making this beautiful work and she was very happy.
 )
)
Ahora les muestro un reporte de mis resultados de las delegaciones realizadas como muestra de mi confianza y apoyo a la comunidad.
Now I show you a report of my results of the delegations made as a sign of my confidence and support to the community
The photos were taking by me with my phone and editated with
Las fotos fueron tomadas por mi teléfono y editadas en
canva