Everyone is always busy....
And to make wholesome spreads takes time—especially the all time popular coconut spread from the South East Asia (dominated by Malaysia and Singapore)—the Kaya!

Kaya, the infamous Coconut, eggy, and sweat spread that is perfect with butter on toast, has been a staple food for mostly Chinese speaking community in Malaysia (and Singapore), where most of the earliest Coffee Brewers love to pair their buttery roasted coffee with it as morning breakfast.

However, to cater majority of the public who are not sensitive to coconut or is not diabetic, the vegetarian version has been widely marketed; though there are some very low egg % exist in it and called it a "nonya" kaya.
(Not to mention they cut down the coconut milk and added starch!)
So for a busy person like me, it is time to fast track and make a store bought kaya into PREMIUM.
It is also because this is one of the "added value" proteins that my mom can have apart of half-boiled eggs. She is beginning to be able to take freshly cooked tender chicken drum stick, but can't have often.
So what can it be done?

Improvise! Since I am not equipped to make a perfect kaya from scratch without over burning it, I have decided to use a handicapped cheat route to ensure the kaya base is not burnt to begin with. 😂

Since the store bought (overly sweet) "cheap" kaya has some egg in it (per say—which I doubt it is that accurate because the texture speaks a lot), I have decided to up its richness with 3 extra eggs and a box of coconut milk. Of course, freshly squeezed coconut milk is most ideal, but recently due to too many holidays, there are hardly any good fresh ones. Most of the time they turn bad quickly, probably due pre-packing, unlike most wet markets that will squeeze right on the pot during order, so to make sure my parents do not get food poisoning, we opt for the UHT version.

I checked through a YouTube sharing on how to make the spread as smooth as possible without lumps, and found out that the most challenging part are the eggs.

The eggs are only allowed to be mixed (not beaten) to make sure as minimal bubbles as possible to avoid "excessive air" whipped into the whites.

Then it has to be strained over a fine sift to make sure that the proteins are properly broken.

I actually had to sift through twice to make sure that the clump whites can be sift through properly.

When I realised that the clumps are just not passing through, I purposefully beat that last bits of them till it bubbles (not peaks) and sift through again to get the finest egg mixture ever.
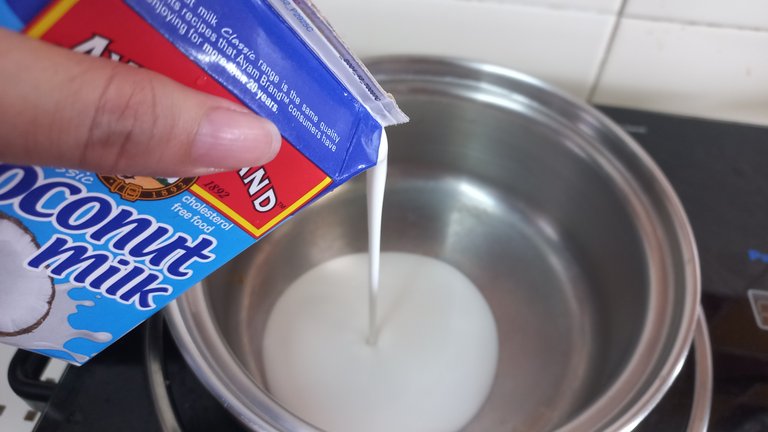
While I let the egg mixture "settle" aside, I poured and heat up in the coconut milk with low fire / heat to make sure it is not burnt.

Then a tiny bit of salt was put in to just balance the overly sweeten store-bought spread to have that "dan jjang" (sweet salty in Korean) flavour.

Once it starts to simmer, I added fresh Pandan leaves to give that Asian vanilla fragrance everyone in the house loves.

And when the coconut milk starts to boil a tiny bit, I cut off the head and add on the store-bought spread—two small containers in total.

Incorporate all the mixture while the heat is still permeating from the pot.

And stir it until it is well incorporated.
Optional Step

While letting the mixture to cool down a little, I noticed because of the additional coconut milk, the spread no longer has that chocolate glossy look that most kaya has, and I have decided to "add additional colouring" to it, by using brown or red sugar to do the trick.
Yes. No artificial colouring

With 1:1 ratio of sugar and water, once it comes to a boil and the fragrance of slightly burnt sugar is in the air, pour in immediately to the mixture.
Now the challenging "exercising" part
This actually requires a lot of "arm exercise"

Mom had to come help holding it so that I can take a picture of it
When the mixture is luke warm, pour in the sifted egg one more time into the mixture to make sure that it has no more clumps at all and to ensure its smoothness.

Before putting back to the heat, it has to be well incorporated. Otherwise, we will risk clumps of cooked eggs mixed with coconut paste!
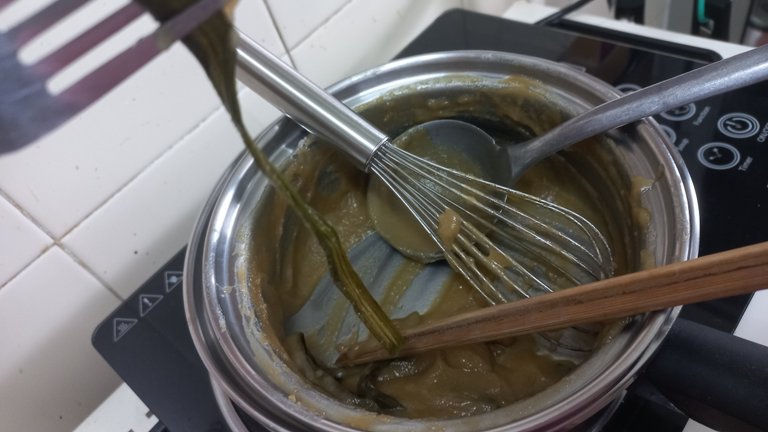
Time for double boiling!

Yes, you got to put in a pot of hot water outside and the mixture in the boiling water under medium heat. This will actually reduce the probability to overcook the eggs in the mixture before it is well incorporated.

While the head is ongoing, keep stirring in consistent speed to make sure that it will not be clumpy. A lot of people might have asked, "why not use a hand mixer?"
That's because I don't have one yet; but I'm going to get one for my jubilee birthday
Also, it has to be consistently stirred with a whisk because it is cooking until thickens. Hand mixier may not do it properly and could splatter everywhere.

Reusing the container
The final consistency has to be smooth and creamy looking. And once that is achieve, it is ready to be transferred into containers.
Because every single creamy spread is so rich, it should not be wasted. Just use the chopsticks to separate the creamy spread from the pandan leaves before washing it to avoid ants coming for a feast.

Unlike my mom who usually put it into one big tub, I have decided to keep them on smaller containers to reduce exposed contamination.
One small container can at least have 1 week's worth of sweet spread sandwiches for two (my parents) and the rest are kept in the fridge after cooled to extend its shelf life.
What do you think?
Would you give this fast track method a go?
The entire process took me almost an hour; while making from scratch could take me up to 2–3 hours, and if I am bad I could take longer. haha... 😅
If you are giving this a go, do feel free to share your experience here!
Until Then
Stay healthy, stay curious and learn new things, and stay happy!


If you would like to give some encouragement outside HIVE with some fiat backing, please feel free to visit: https://www.buymeacoffee.com/littlenewthings
You can also support me in HIVE
